KHHsubs
Playspots
Maps
The maps below indicate when and where playspots become available during the main story. Most of them are available from Chapter 5, but others become available as you progress through the story. Of all the playspots in the game, there is only one that requires the completion of a substory to play - Star Actor, which becomes available after completion of request 32.
Gion

Rakugai

Forest Road

Mountain Road
Kawara Street

River Road

Hozoin Temple

Received Items
Below are the items you can receive by completing mini-games. Note that for training mini-games you can also receive abilities as a reward. For those details, please see the corresponding section on the training page. This page is just for items you receive. If you can only get an item one time, that will be indicated below with "first time only" in the header. If you only receive the item after already completing the course (e.g. in a training mini-game where you are rewarded with an ability the first time you complete it), that is indicated with "second time onwards" in the header.
Horse Archery
| Course | Conditions | Items |
|---|---|---|
| Beginner | Score at least 530 points | Manju |
| Normal | Score at least 465 points | Grilled Dango |
| Improved | Score at least 435 points | Frenzy Pill |
| Master | Score at least 520 points | Vitality Pill |
Jiraiya
| Course | Item |
|---|---|
| First Section | Juzumaru |
| Earth Section | Mikazuki Munechika |
| Water Section | Onimaru Kunitsuna |
| Fire Section | Dojigiri Yasutsuna |
| Air Section | Daitenta |
| Sky Section | Muramasa |
| Extreme Section | Masamune |
Scarecrow (first time only)
| Course | Items |
|---|---|
| Purgatory | Special Knife Masamune |
Scarecrow (second time onwards)
| Course | Conditions | Item |
|---|---|---|
| Starter | Time of less than 1 Minute 5 Seconds Time of less than 1 Minute 10 Seconds Time of less than 1 Minute 20 Seconds Time of less than 1 Minute 30 Seconds Time of less than 1 Minute 40 Seconds |
Yasaka Shrine Amulet Sarashi Frenzy Pill - High Grade Frenzy Pill Vitality Pill |
| Twins | Time of less than 1 Minute 35 Seconds Time of less than 1 Minute 40 Seconds Time of less than 1 Minute 50 Seconds Time of less than 2 Minutes Time of less than 2 Minutes 10 Seconds |
Yasaka Shrine Amulet Sarashi Frenzy Pill - High Grade Frenzy Pill Vitality Pill |
| Demon | Time of less than 1 Minute 25 Seconds Time of less than 1 Minute 30 Seconds Time of less than 1 Minute 40 Seconds Time of less than 1 Minute 50 Seconds Time of less than 2 Minutes |
Yasaka Shrine Amulet Sarashi Frenzy Pill - High Grade Frenzy Pill Vitality Pill |
| Ninja | Time of less than 1 Minute 25 Seconds Time of less than 1 Minute 30 Seconds Time of less than 1 Minute 40 Seconds Time of less than 1 Minute 50 Seconds Time of less than 2 Minutes |
Gion Inari Amulet Sarashi Frenzy Pill - High Grade Frenzy Pill Vitality Pill |
| Regular Strength | Time of less than 1 Minute 55 Seconds Time of less than 2 Minutes Time of less than 2 Minutes 10 Seconds Time of less than 2 Minutes 20 Seconds Time of less than 2 Minutes 30 Seconds |
Gion Inari Amulet Yasaka Shrine Amulet Sarashi Frenzy Pill Vitality Pill - High Grade |
| Twin Strength | Time of less than 2 Minutes Time of less than 2 Minutes 5 Seconds Time of less than 2 Minutes 15 Seconds Time of less than 2 Minutes 25 Seconds Time of less than 2 Minutes 35 Seconds |
Gion Inari Amulet Yasaka Shrine Amulet Sarashi Frenzy Pill Vitality Pill - High Grade |
Scarecrow (second time onwards)
| Course | Conditions | Item |
|---|---|---|
| Great Strength | Time of less than 1 Minute 50 Seconds Time of less than 1 Minute 55 Seconds Time of less than 2 Minutes 5 Seconds Time of less than 2 Minutes 15 Seconds Time of less than 2 Minutes 25 Seconds |
Chain-Stitched Leggings Yasaka Shrine Amulet Sarashi Frenzy Pill - High Grade Vitality Pill - High Grade |
| Painful Strength | Time of less than 2 Minutes 20 Seconds Time of less than 2 Minutes 25 Seconds Time of less than 2 Minutes 35 Seconds Time of less than 2 Minutes 45 Seconds Time of less than 2 Minutes 55 Seconds |
Chain-Stitched Leggings Gion Inari Amulet Sarashi Frenzy Pill - High Grade Vitality Pill - High Grade |
| Truthseeking | Time of less than 2 Minutes Time of less than 2 Minutes 5 Seconds Time of less than 2 Minutes 15 Seconds Time of less than 2 Minutes 25 Seconds Time of less than 2 Minutes 35 Seconds |
Chain-Stitched Leggings Gion Inari Amulet Sarashi Frenzy Pill - High Grade Vitality Pill - High Grade |
| Twin Heaven | Time of less than 2 Minutes 20 Seconds Time of less than 2 Minutes 25 Seconds Time of less than 2 Minutes 35 Seconds Time of less than 2 Minutes 45 Seconds Time of less than 2 Minutes 55 Seconds |
Brittle Steel Sword Gion Inari Amulet Yasaka Shrine Amulet Frenzy Pill - High Grade Vitality Pill - High Grade |
| Extreme | Time of less than 2 Minutes Time of less than 2 Minutes 5 Seconds Time of less than 2 Minutes 15 Seconds Time of less than 2 Minutes 25 Seconds Time of less than 2 Minutes 35 Seconds |
Unsigned Sword Chain-Stitched Leggings Yasaka Shrine Amulet Frenzy Pill - High Grade Vitality Pill - High Grade |
| Purgatory | Time of less than 2 Minutes 20 Seconds Time of less than 2 Minutes 25 Seconds Time of less than 2 Minutes 35 Seconds Time of less than 2 Minutes 45 Seconds Time of less than 2 Minutes 55 Seconds |
Resurrection Magatama Chain-Stitched Leggings Yasaka Shrine Amulet Frenzy Pill - High Grade Vitality Pill - High Grade |
Melon Cutting (second time onwards)
| Course | Items |
|---|---|
| Foundational Zeal | Aodamo Wood |
| Applied Zeal | Frenzy Pill - High Grade |
| Developed Zeal | Red Oak Wood |
| Zeal Special Training [Wild Boar] | Frenzy Pill |
| Zeal Special Training [Snake] | Frenzy Pill - Special Grade |
| Zeal Special Training [Asura] | Sacred Tree Wood |
Gambling Den Prize Exchange
| Item | Wooden Tag Cost |
|---|---|
| Manju | 10 |
| Mandarin | 10 |
| All-Purpose Pill - Special Grade | 500 |
| Lapis Lazuli | 5000 |
| Miracle Water | 200 |
| Dragon Whisker | 1500 |
Star Actor
| Conditions | Item |
|---|---|
| Earn 1000 Ryo (in one attempt) | Star Actor Umbrella |
Mahjong Prize Exchange
| Item | Chip Cost |
|---|---|
| Nada Refined Sake | 600 |
| Nara Morohaku | 1400 |
| Scrap Iron | 500 |
| Dragon Scale | 20000 |
Shogi (Trials)
| Course | Item |
|---|---|
| Trial 1 | Grilled Dango |
| Trial 2 | Ohagi |
| Trial 3 | Frenzy Pill |
| Trial 4 | Satsuma Shochu |
| Trial 5 | Frenzy Pill - High Grade |
| Trial 6 | Frenzy Pill - Special Grade |
| Trial 7 | All-Purpose Pill - Special Grade |
| Trial 8 | Brawler's Sarashi |
| Trial 9 | European Cloth |
| Trial 10 | Edo Women's Sachet |
| Final Trial | Portuguese Hand Mirror |
Shogi (Ranking)
| Opponent's Rank | Reward |
|---|---|
| Shogi King | Gold Comb |
| 10th Dan | Gambler's Tobacco |
| 9th Dan | Castella |
| 8th Dan | Konpeito |
| 7th Dan | All-Purpose Pill - High Grade |
| 6th Dan | Sarashi |
| 5th Dan | Horse Meat |
| 4th Dan | Vitality Pill - High Grade |
| 3rd Dan | Frenzy Pill - High Grade |
| 2nd Dan | Vitality Pill |
| 1st Dan | Scallop |
| Rank 1 | Nada Refined Sake |
| Rank 2 | Sludge Worm (Medium) |
| Rank 3 | Unrefined Sake |
| Rank 4 | Snail |
| Rank 5 | Ginger |
| Rank 6 | Pepper |
| Rank 7 | Rice Ball |
| Rank 8 | Tri-Colour Dango |
| Rank 9 | Kujo Onion |
| Rank 10 | Manju |
Completion
When you meet the clear conditions for every mini-game, you are rewarded with the Runner's Shoes. When equipped, this item allows you to sprint outside battle (does not work in Gion). See the playspot sections on this page for details on how to complete them.
Completion Rewards
| Complete all mini-games | Runner's Shoes |
| Defeat all opponents in the Arena | Ganryu Wooden Sword |
Mini-Game Completion Requirements
| Minigame | Conditions |
|---|---|
| Turtle Racing | Win all 63 races |
| Shogi | Defeat the Shogi King Complete all the Shogi trials |
| Mahjong | Score at least 50000 points in a single game |
| Hanafuda |
Win a cumulative total of 20 points in 3 round games Win a cumulative total of 30 points in 6 round games Win a cumulative total of 35 points in 9 round games Win a cumulative total of 40 points in 12 round games |
| Odds and Evens | Win a cumulative total of 200000 points |
| Cee-Lo | Win a cumulative total of 200000 points |
| Minigame | Conditions |
|---|---|
| Konpira Fune Fune | Defeat all 4 Yujo |
| Bottle Knockdown | Defeat all 4 Yujo |
| Iroha Karuta | Defeat all 4 Yujo |
| Fan Toss | Defeat all 4 Yujo |
| Horse Archery | Achieve the "Master" rank in all courses |
| Melon Cutting | Achieve the "Man" or "Man amongst men" rank in all courses |
| Waterfall | Achieve the "Nirvana" rank in all courses |
| Scarecrow | Achieve the "Master" rank in all courses |
| Jiraiya | Achieve the "Master" rank in all courses |
| Star Actor | Collect at least 1000 Ryo in a single performance |
Konpira Fune Fune
| Location | Yumejiya (Gion) |
| Available From | 5-1 |
Players move in time with the music that accompanies the konpira fune fune game. The difficulty of this mini-game will vary depending on your opponent. The most skilled player of this game is Asagiri.
Controls
| SELECT | Pause |
| START | Controls |
| Tap table (closed palm) | |
| Tap table (open palm) / Place hakama on table | |
| Pick up hakama / keep hold of hakama |

How to play
This is a game in which the player and yujo take turns picking up the hakama on the table. Check the table provided here to see what options are available in each situation (e.g. when the hakama is there or not there). If you do anything different to what the table shows, you will lose.
The game continues until one of you loses, but if the turn counter gets up to 100, the yujo will surrender and you win.
The music (and therefore the mini-game) speeds up when you hit a certain number of turns. It first speeds up after 10 turns, then 30 turns, then 50 turns, then finally 70 turns.
Available options
 |
(While holding the hakama) - Continue to keep hold of the hakama - Place the hakama on the table |
 |
(When the hakama is on the table) - Pick up hakama - Tap table (with open palm) |
 |
(When the hakama is not on the table) - Tap table (with closed palm) |
When the hakama is on the table
When the hakama is on the table when it comes to your turn, it's a good idea to pick it up right away. Then you can keep the hakama for 3 turns before you have to put it down again. This lets you build up the turns counter some more and the yujo might accidentally try to pick up the hakama when it's not there, so you'll win. In other words, keeping hold of the hakama as often as possible is a safe way to play as it keeps you in control of the game.
When your opponent has the hakama
Paying close attention to the audio will help make this easier for you. If you listen carefully, there is a very slight knock sound when the yujo places the hakama back on the table. If there is no sound, it means she is keeping hold of it. So, if you don't hear any sound, press the button and if you do hear that slight knocking sound, press to pick it up.
Bottle Knockdown
| Location | Yumejiya (Gion) |
| Available From | 5-1 |
10 bottles are lined up at the end of a passage. The objective is to throw a ball at them to knock them down. Simplest way to describe this mini-game is that it is Edo-period bowling. The way to play the game, as well as the basic rules, are exactly the same as bowling.
Controls
| SELECT | Pause |
| START | Controls |
| Cancel | |
| Check score | |
| Change ball | |
| Accept / set power, direction, etc. | |
| Left spin | |
| Right spin | |
| Directional buttons | Change position / Select ball |
NOTEDepending on your console region, the and buttons may be swapped.

How to play
Follow the steps shown here to go through the process of bowling. Before starting that process, you can press to select a different ball. There are 5 balls, each with a different weight. The heavier balls are more effective at knocking down pins, but the downside is that they are more difficult to spin. There is no time limit when you are bowling, so take your time to get the perfect bowl.
Bowling process
| 1 | Use the directional buttons to change your position in the lane, then press to confirm |
| 2 | Stop the power gauge with to set the power of the throw |
| 3 | Press the button to set the direction of the throw |
| 4 | Use the and buttons to determine the spin of the throw (you can adjust the spin up to the moment the ball leaves Kiryu's hand) |
Recommendation

Select the heaviest ball. Next, go exactly 5 steps to the right from the starting position. Then, try to get the power, direction, and spin close to what you see in the picture above (there is some room for error). With practice, this method can reliably get you consistent strikes.
Iroha Karuta
| Location | Azamiya (Gion) |
| Available From | 5-1 |
Listen to the phrase being read out by the kamuro, then pick up the card which has the first syllable indicated on it. (e.g. if it starts with "ma" select the card with "ma" on it).
Controls
| SELECT | Pause |
| START | Controls |
| Pick up card | |
| Left Analogue Stick | Move cursor |
NOTEDepending on your console region, the and buttons may be swapped.

How to play
Move your cursor over a card and press to pick it up. A player wins when they score enough that it is no longer possible for the opponent to win (e.g. as soon as someone hits a score of 4 in a 7 round game). Note that if a player picks up the wrong card, the other player wins that round.
Needless to say, if you don't read Japanese and/or are not good with Japanese listening, you may struggle with this one (even if you do know Japanese this one can be really annoying - trying to find the right card even if you know the one you want is not an easy task). See below for the pictures of the cards plus the Japanese text that appears on screen when it is read out.
Tip: Wait for the text to start appearing, pause the game, then look up the card you need here (match the first character against the Japanese text below). That way you know exactly what you're looking for and don't have to worry about the yujo finding it before you even get a chance to work out which one you need to grab.

Note that this game includes the use of archaic kana that is no longer used in modern Japanese. Also, some of the cards have special readings which don't match the usual pronunciation of the kana on the card (this is especially the case with the "N" card).
I
犬も歩けば棒に当たる
Ro

論より証拠
Ha
花より団子
Ni

二階から目薬
Ho

仏の顔も三度
He

下手の長談義
To

年寄りの冷や水
Chi

地獄の沙汰も金次第
Ri

律義者の子沢山
Nu

糠に釘
Ru

類をもって集まる
Wo

鬼も十八
Wa
笑う門には福来る
Ka
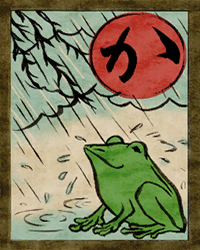
かえるの面に水
Yo

夜目遠目 傘のうち
Ta

立て板に水
Re

れうやく(良薬)はロに苦し
So

袖の振り合わせも他生の縁
Tsu

爪に火をともす
Ne

猫に小判
Na

泣きっ面に蜂
Ra

来年の事を言えば鬼が笑う
Mu

無芸大食
U

氏より育ち
Wi

鰯の頭も信心から
No
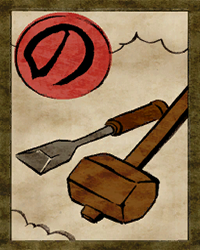
ノミと言えば槌
O
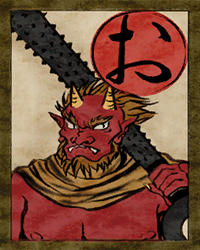
鬼に金棒
Ku

臭いものに蓋をする
Ya
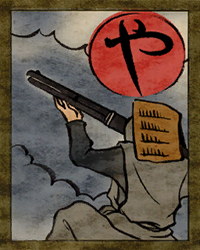
闇に鉄砲
Ma

負けるが勝ち
Ke

芸は身を助く
Fu
武士は食わねど高楊枝
Ko

これにこりよ道才坊
E

縁と月日
Te

寺から里へ
A

頭隠して尻隠さず
Sa

竿の先に鈴
Ki

聞いて極楽見て地獄
Yu

油断大敵
Me

目の上のこぶ
Mi

身から出た錆
Shi

知らぬが仏
We

縁の下の力持ち
Hi

瓢箪から駒
Mo

桃栗三年柿八年
Se

背に腹は変えられぬ
Su

雀百まで踊り忘れぬ
N

京の夢大阪の夢
Fan Toss
| Location | Azamiya (Gion) |
| Available From | 5-1 |
You throw a fan at an object known as a "butterfly". The points you score can vary depending on the throw (see below for details).
Controls
| SELECT | Pause |
| START | Controls |
| Proceed / Skip | |
| Left Analogue Stick | Pull back and then release to throw fan |
NOTEDepending on your console region, the and buttons may be swapped.

How to play
You only use the left analogue stick in this mini-game. Pull the stick back (down) then release to throw the fan at the butterfly. How far you pull the fan back determines the power of the throw. You get the most points by directly hitting the butterfly and knocking it off the table. After 5 rounds, the player with the highest score wins.
If you put too much power into the throw, the fan will miss the butterfly and stand completely. Try not to pull back too much when throwing the fan.
Points
| 3 Points | Directly hit the butterfly, which then falls to the floor |
| 2 Points | Directly hit the butterfly, but it doesn't fall to the floor (stays on the stand) |
| 1 Point | The butterfly is knocked over when the fan hits the stand (even if the butterfly falls to the floor, it's still only 1 point if you hit the stand) |
| 0 Points | Fail to hit either the butterfly or the stand |
Horse Archery
| Location | Forest Road |
| Available From | 5-15 |
In this game you are riding on a horse and armed with a bow. You fire arrows at targets that appear along the route to score points. It takes time to prepare and charge your shot so make sure you start firing before you get to the target (in other words, it doesn't fire instantly when you hit the shoot button).
Controls
| SELECT | Pause |
| START | Controls |
| / / / | Avoid obstacles (button is a random QTE) |
| Hold down to prepare shot, release to fire Holding it down for longer increases the power of the shot |
|
| Left Analogue Stick | Move crosshair |
How to play
Pull back the bow with the , then release the button to fire the arrow. It takes some time to prepare the shot so it can be easy to miss a target if you leave it too late. You may as well have your shot prepared well in advance of when you need it.
When you hit a target, the amount of points you get varies depending on a few factors (see below). Note that to destroy the green targets, you must hit it with a fully-charged shot (you'll know if a shot is fully charged when you hear a sound and Kiryu starts glowing as if he's in heat mode). By the way, if you do manage to hit one target more than once, you will only receive points from the first hit. Also, you may have already noticed, but the game does not have the decency to show you how many points you currently have (you only find out your score at the end of the course).
On some courses, there may be obstacles in your path that you have to avoid. When you get near the obstacle, you get a QTE (button is random). Failure to avoid the obstacle will stun Kiryu for a few seconds (cannot fire your bow while stunned).
Tip: If you charge a shot, as long as you keep the button held down you keep that charge even if you are dodging an obstacle. You'll have to do this to get the master rank on some of these courses because there are targets immediately after an obstacle and if you wait until after passing the obstacle to prepare your shot, you will not get it in time. So, charge the shot, press the QTE button (with held down throughout) then after passing the obstacle you can unleash a fully-charged shot right away.

When you see 3 targets lined up next to each other, you will need to fire a fully charged shot down the middle of them (when the 3 are lined up exactly) to take them all out. The timing can be tricky, but you'll need to get used to it if you want to pass these courses.
Points
| 10 Points | Red Target | Hit target outside the centre (target is not destroyed) |
| 20 Points | Red Target | Hit target in the centre (target is destroyed) |
| 15 Points | Green Target | Hit target outside the centre (target is not destroyed) |
| 25 Points | Green Target | Hit target in the centre (target is not destroyed) |
| 40 Points | Green Target | Hit target in the centre with a fully-charged shot (target is destroyed) |
Beginner
| Reward: | Maximum Heat Increase #4 |
Ranks (point requirements)
| Master | Expert (Pass Rank) | Warrior | Inexperienced | Mediocre |
|---|---|---|---|---|
| 630 | 530 | 400 | 200 | <200 |
 Red Target
 Green Target
 Obstacle


Normal
| Reward: | Maximum Heat Increase #5 |
Ranks (point requirements)
| Master | Expert (Pass Rank) | Warrior | Inexperienced | Mediocre |
|---|---|---|---|---|
| 630 | 530 | 400 | 200 | <200 |
Red Target
Green Target
Obstacle


Improved
| Reward: | Maximum Heat Increase #6 |
Ranks (point requirements)
| Master | Expert (Pass Rank) | Warrior | Inexperienced | Mediocre |
|---|---|---|---|---|
| 685 | 580 | 435 | 220 | <220 |
Red Target
Green Target
Obstacle


Master
| Reward: | Maximum Heat Increase #7 |
Ranks (point requirements)
| Master | Expert (Pass Rank) | Warrior | Inexperienced | Mediocre |
|---|---|---|---|---|
| 820 | 690 | 520 | 260 | <260 |
Red Target
Green Target
Obstacle


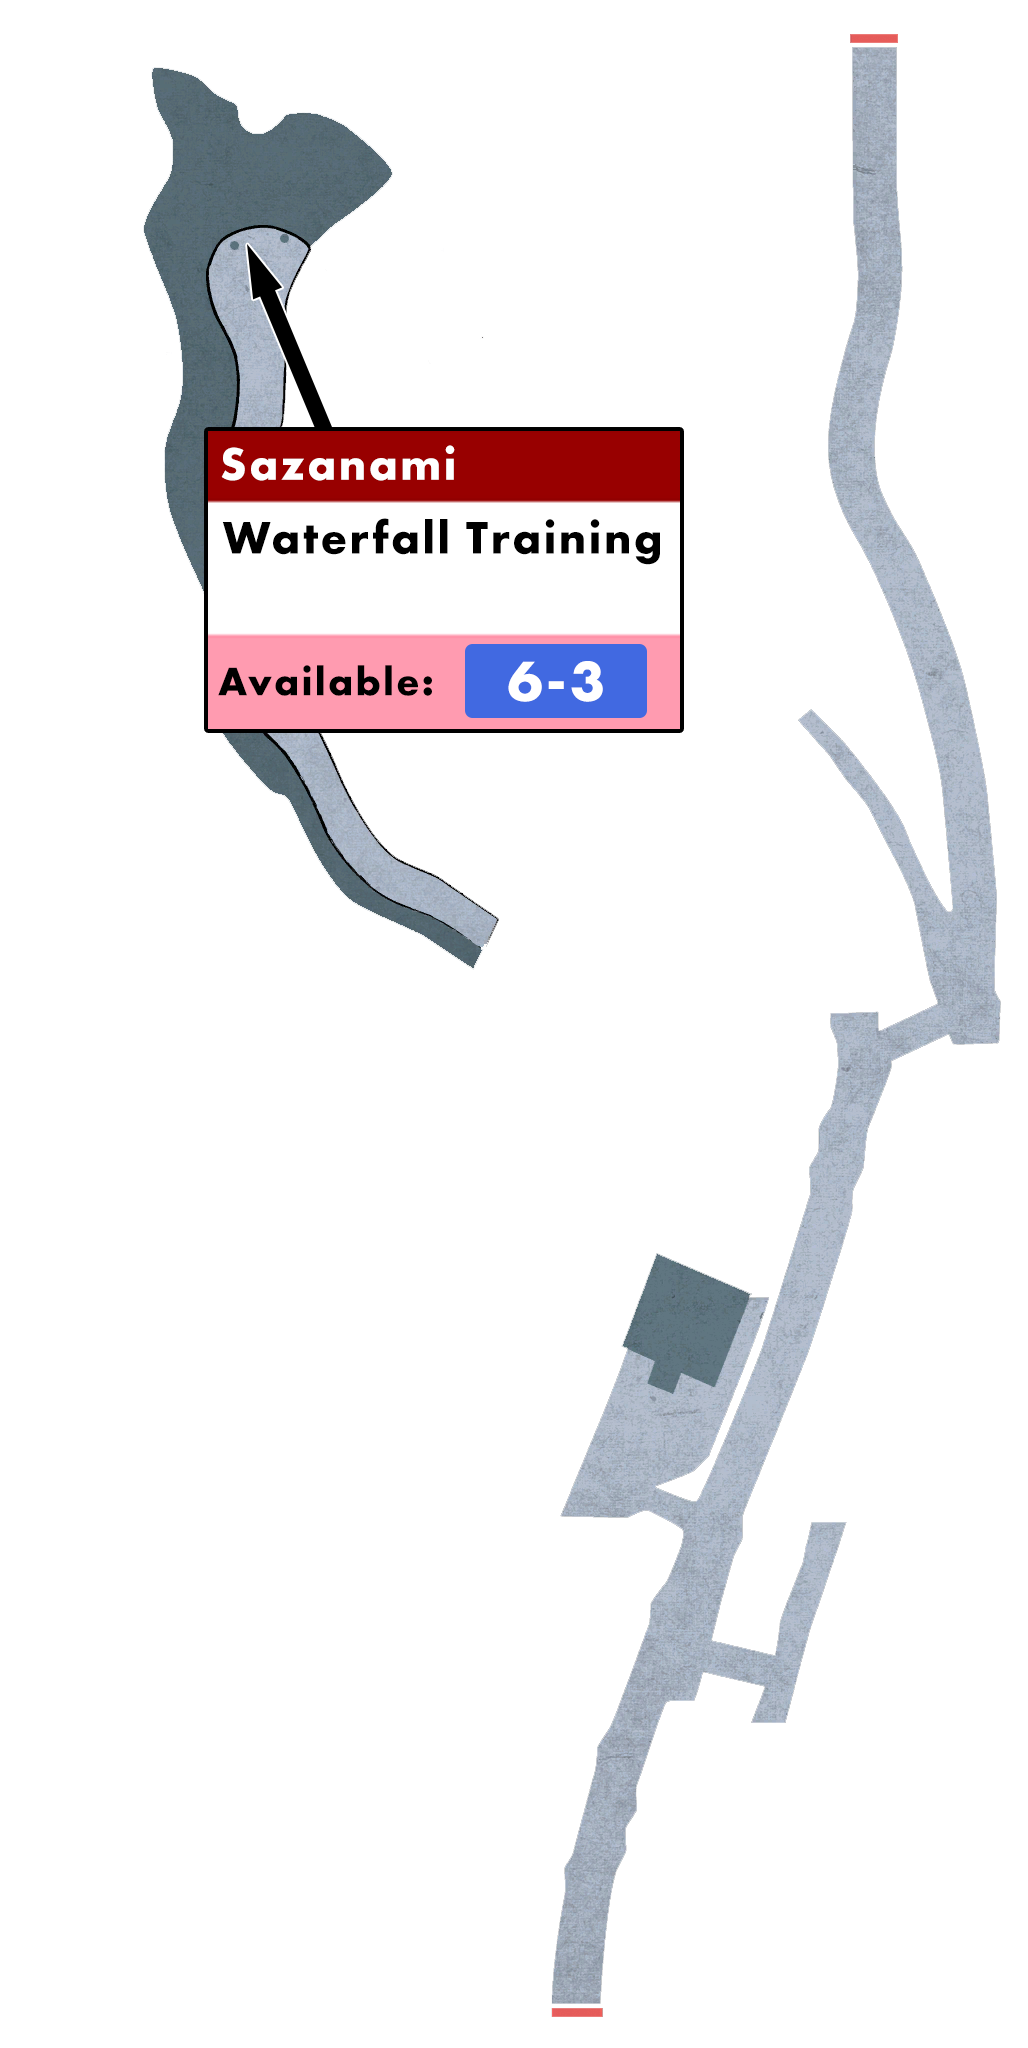
Waterfall
| Location | Mountain Road (Waterfall) |
| Available From | 6-3 |
A mind-training exercise in which Kiryu attempts to focus on self-discipline while tempted by earthly temptations.
Controls
| SELECT | Pause |
| START | Controls |
| / / / | Action |
| Motion Sensor | Shake off earthly desires |

How to play
On the screen, input buttons will float around until they land in the "Action Point" - you only press the action buttons when the input button reaches that point. If you've played any of the newer Yakuza/Like a Dragon games, this works exactly like karaoke. Get the timing right to build up the enlightenment scale. You pass the course if you can finish with the scale above the pass line. As the enlightenment scale increases, the speed of the button displays also increases.
Depending on your timing, you will receive a different input rating which affects your score. If you are too fast, your rating will be "okay", if you are slightly too fast you get a rating of "good". If your timing is spot on your rating will be "great". If you are too slow you don't get anything. See below to see how the score is affected by various things, such as input rating and current combo.
If the mini-game throws you into a "shake off earthly desires" section, you just have to shake the controller until it moves you on to the next bit.
Input rating timing
Input Rating Score
| Rating | Speed 1 | Speed 2 | Speed 3 | Speed 4 | Speed 5 |
|---|---|---|---|---|---|
| Okay | 5 | 8 | 15 | 30 | 50 |
| Good | 8 | 12 | 20 | 38 | 60 |
| Great | 10 | 15 | 30 | 50 | 70 |
| Miss | 0 | 0 | 0 | 0 | 0 |
Input Rating Enlightenment Scale Change
| Rating | Speed 1 | Speed 2 | Speed 3 | Speed 4 | Speed 5 |
|---|---|---|---|---|---|
| Okay | 2 | 2 | 2 | 2 | 2 |
| Good | 3 | 3 | 3 | 3 | 4 |
| Great | 4 | 4 | 5 | 5 | 6 |
| Miss | -35 | -35 | -32 | -30 | -27 |
Score - Combo Bonus
| Combo | Speed 1 | Speed 2 | Speed 3 | Speed 4 | Speed 5 |
|---|---|---|---|---|---|
| 2 | 2 | 3 | 4 | 6 | 8 |
| 3 | 4 | 6 | 8 | 21 | 18 |
| 4 | 6 | 9 | 12 | 18 | 28 |
| 5 | 8 | 12 | 16 | 24 | 38 |
| 6 | 10 | 15 | 20 | 30 | 48 |
| 7 | 12 | 18 | 24 | 36 | 58 |
| 8+ | 15 | 25 | 30 | 45 | 70 |
Enlightenment Scale - Combo Bonus
| Combo | Speed 1 | Speed 2 | Speed 3 | Speed 4 | Speed 5 |
|---|---|---|---|---|---|
| 2 | 1 | 1 | 1 | 1 | 1 |
| 3 | 2 | 2 | 2 | 2 | 2 |
| 4 | 2 | 2 | 3 | 3 | 3 |
| 5 | 3 | 3 | 3 | 3 | 3 |
| 6 | 3 | 3 | 4 | 4 | 4 |
| 7 | 4 | 4 | 4 | 4 | 4 |
| 8+ | 4 | 4 | 6 | 6 | 6 |
Earthly Desires - Pleasure from a Rod
| Reward: | Red Pride |

Enlightenment Scale
| Max | 1200 |
| Pass Line | 650 |
| Initial Amount | 550 |
Rank Requirements
| Nirvana | 12000 |
| Matsu | 10000 |
| Take | 8000 |
| Ume | <8000 |


Earthly Desires - Embarrassed by Restraint
| Reward: | White Pride |

Enlightenment Scale
| Max | 1500 |
| Pass Line | 900 |
| Initial Amount | 700 |
Rank Requirements
| Nirvana | 13000 |
| Matsu | 11000 |
| Take | 9000 |
| Ume | <9000 |


Earthly Desires - Lips of Pure Love
| Reward: | Black Pride |

Enlightenment Scale
| Max | 1700 |
| Pass Line | 1100 |
| Initial Amount | 800 |
Rank Requirements
| Nirvana | 17000 |
| Matsu | 14000 |
| Take | 11000 |
| Ume | <11000 |


Earthly Desires - Spread Legs, Opening the Path to a Dream
| Reward: | Blue Pride |

Enlightenment Scale
| Max | 1900 |
| Pass Line | 1300 |
| Initial Amount | 1000 |
Rank Requirements
| Nirvana | 22000 |
| Matsu | 20000 |
| Take | 17000 |
| Ume | <17000 |


Earthly Desires - Debauchery
| Reward: | Yellow Pride |

Enlightenment Scale
| Max | 1900 |
| Pass Line | 1300 |
| Initial Amount | 1000 |
Rank Requirements
| Nirvana | 18000 |
| Matsu | 15000 |
| Take | 12000 |
| Ume | <12000 |


Scarecrow
| Location | Koetsu's Mansion (Kawara Street) |
| Available From | 6-6 |
Various scarecrow pop up from the floor and you need to destroy them all to complete the mini-game. Completing these mini-games for the first time unlocks a variety of useful abilities, including combo upgrades.
The controls in this mini-game are the same as regular combat, but without the ability to change style.

How to play
Playing this mini-game feels a lot like a regular battle elsewhere in the game. The only real difference is that your opponents are scarecrows and you cannot change style. There are different types of scarecrow and each will take a certain number of hits to destroy. To save time, make sure you are only hitting each scarecrow with as few hits as possible (so you don't waste time swinging your sword into thin air because you spammed the attack button). At certain points during these courses, spears will jump up from the floor and restrict your movement in the area (you'll have to navigate around them to get to the next scarecrow), so getting used to when and where these things pop up will help you optimise your route and get the course completed as soon as possible.
One of the scarecrow types is the archer type - this scarecrow will fire arrows at you. If the arrow hits you, it will stun you and waste valuable time. You are able to block the arrows or dodge them to prevent being stunned. Learning the "Secret Skill - Tengu Feet" ability from Tengu Mask will be extremely useful for this mini-game, since it allows you to evade in the middle of a combo.
Number of hits required to destroy scarecrows
| Style | Attack | Basic Scarecrow | Archer Scarecrow | Armoured Scarecrow |
|---|---|---|---|---|
| Single Sword | Regular attack / Regular attack / Zanki Style - Dashing Blade | 1 | 1 | 3 |
| Single Sword | Zanki Style - Boulder Slice / Zanki Style - Whirlwind Blade / Zanki Blade Stage 1~3 | 1 | 1 | 2 |
| Two Sword | Regular attack | 2 | 2 | 4 |
| Two Sword | Regular attack / Two Sword Rolling Slice | 2 | 2 | 3 |
| Greatsword | Regular attack / Regular attack / Knockdown Strike | 1 | 1 | 2 |
| Shortsword | Regular attack / Regular attack | 3 | 3 | 5 |
| Shortsword | Running Stab | 2 | 2 | 4 |
Single Sword
Most scarecrows can be taken out with a single attack, so you should mostly use a single attack to save wasting time. For the armoured scarecrows, using the Zanki Style - Boulder Slice ability is a quick way to take them out.
Two Sword / Shortsword
You should probably avoid using any fancy techniques with these styles - just focus on rushing up to the scarecrows and using attacks to take them out quickly.
Greatsword
You move extremely slowly while using the greatsword, which is a massive disadvantage in this mini-game. Instead of moving regularly to the next scarecrow (left analogue stick), use attacks to move across the area - swinging your sword moves you around faster than just using the left analogue stick. Also, remember the greatsword has a large attack reach so you don't have to be too close to a scarecrow to hit it.
Starter
| Reward: | Single Sword Consecutive Strikes |
Scarecrows
| Basic Scarecrows | 32 |
| Archer Scarecrows | 0 |
| Armoured Scarecrows | 0 |
| Armoured Scarecrows (Archer) | 0 |
Ranks
| Master | Complete within 1 Minute 5 Seconds |
| Advanced | Complete within 1 Minute 40 Seconds |
| Intermediate (Pass Rank) | Complete within 2 Minutes |
| Beginner | Completion time >2 Minutes |
Twins
| Reward: | Two Swords Consecutive Strikes #1 |
Scarecrows
| Basic Scarecrows | 40 |
| Archer Scarecrows | 0 |
| Armoured Scarecrows | 0 |
| Armoured Scarecrows (Archer) | 0 |
Ranks
| Master | Complete within 1 Minute 35 Seconds |
| Advanced | Complete within 1 Minute 50 Seconds |
| Intermediate (Pass Rank) | Complete within 2 Minutes 10 Seconds |
| Beginner | Completion time >2 Minutes 10 Seconds |
Demon
| Reward: | Greatsword Technique - Knockdown Strike |
Scarecrows
| Basic Scarecrows | 13 |
| Archer Scarecrows | 0 |
| Armoured Scarecrows | 15 |
| Armoured Scarecrows (Archer) | 0 |
Ranks
| Master | Complete within 1 Minute 25 Seconds |
| Advanced | Complete within 1 Minute 40 Seconds |
| Intermediate (Pass Rank) | Complete within 2 Minutes |
| Beginner | Completion time >2 Minutes |
Ninja
| Reward: | Shortsword Technique - Running Stab |
Scarecrows
| Basic Scarecrows | 13 |
| Archer Scarecrows | 14 |
| Armoured Scarecrows | 0 |
| Armoured Scarecrows (Archer) | 0 |
Ranks
| Master | Complete within 1 Minute 25 Seconds |
| Advanced | Complete within 1 Minute 40 Seconds |
| Intermediate (Pass Rank) | Complete within 2 Minutes |
| Beginner | Completion time >2 Minutes |
Regular Strength
| Reward: | Single Sword Technique - Dodge Strike |
Scarecrows
| Basic Scarecrows | 25 |
| Archer Scarecrows | 0 |
| Armoured Scarecrows | 25 |
| Armoured Scarecrows (Archer) | 0 |
Ranks
| Master | Complete within 1 Minute 55 Seconds |
| Advanced | Complete within 2 Minutes 10 Seconds |
| Intermediate (Pass Rank) | Complete within 2 Minutes 30 Seconds |
| Beginner | Completion time >2 Minutes 30 Seconds |
Twin Strength
| Reward: | Two Swords Consecutive Strikes #2 |
Scarecrows
| Basic Scarecrows | 15 |
| Archer Scarecrows | 14 |
| Armoured Scarecrows | 18 |
| Armoured Scarecrows (Archer) | 0 |
Ranks
| Master | Complete within 2 Minutes |
| Advanced | Complete within 2 Minutes 15 Seconds |
| Intermediate (Pass Rank) | Complete within 2 Minutes 35 Seconds |
| Beginner | Completion time >2 Minutes 35 Seconds |
Great Strength
| Reward: | Maximum Heat Increase #1 |
Scarecrows
| Basic Scarecrows | 15 |
| Archer Scarecrows | 8 |
| Armoured Scarecrows | 13 |
| Armoured Scarecrows (Archer) | 0 |
Ranks
| Master | Complete within 1 Minute 50 Seconds |
| Advanced | Complete within 2 Minutes 5 Seconds |
| Intermediate (Pass Rank) | Complete within 2 Minutes 25 Seconds |
| Beginner | Completion time >2 Minutes 25 Seconds |
Painful Strength
| Reward: | Rigid Body Knowledge |
Scarecrows
| Basic Scarecrows | 11 |
| Archer Scarecrows | 14 |
| Armoured Scarecrows | 16 |
| Armoured Scarecrows (Archer) | 0 |
Ranks
| Master | Complete within 2 Minutes 20 Seconds |
| Advanced | Complete within 2 Minutes 35 Seconds |
| Intermediate (Pass Rank) | Complete within 2 Minutes 55 Seconds |
| Beginner | Completion time >2 Minutes 55 Seconds |
Truthseeking
| Reward: | Maximum Heat Increase #2 |
Scarecrows
| Basic Scarecrows | 30 |
| Archer Scarecrows | 9 |
| Armoured Scarecrows | 10 |
| Armoured Scarecrows (Archer) | 0 |
Ranks
| Master | Complete within 2 Minutes |
| Advanced | Complete within 2 Minutes 15 Seconds |
| Intermediate (Pass Rank) | Complete within 2 Minutes 35 Seconds |
| Beginner | Completion time >2 Minutes 35 Seconds |
Twin Heaven
| Reward: | True Rigid Body Knowledge |
Scarecrows
| Basic Scarecrows | 21 |
| Archer Scarecrows | 8 |
| Armoured Scarecrows | 7 |
| Armoured Scarecrows (Archer) | 11 |
Ranks
| Master | Complete within 2 Minutes 20 Seconds |
| Advanced | Complete within 2 Minutes 35 Seconds |
| Intermediate (Pass Rank) | Complete within 2 Minutes 55 Seconds |
| Beginner | Completion time >2 Minutes 55 Seconds |
Extreme
| Reward: | Maximum Heat Increase #3 |
Scarecrows
| Basic Scarecrows | 11 |
| Archer Scarecrows | 2 |
| Armoured Scarecrows | 10 |
| Armoured Scarecrows (Archer) | 12 |
Ranks
| Master | Complete within 2 Minutes |
| Advanced | Complete within 2 Minutes 15 Seconds |
| Intermediate (Pass Rank) | Complete within 2 Minutes 35 Seconds |
| Beginner | Completion time >2 Minutes 35 Seconds |
Purgatory
| Reward: | Special Knife Masamune |
Scarecrows
| Basic Scarecrows | 30 |
| Archer Scarecrows | 16 |
| Armoured Scarecrows | 0 |
| Armoured Scarecrows (Archer) | 0 |
Ranks
| Master | Complete within 2 Minutes 20 Seconds |
| Advanced | Complete within 2 Minutes 35 Seconds |
| Intermediate (Pass Rank) | Complete within 2 Minutes 55 Seconds |
| Beginner | Completion time >2 Minutes 55 Seconds |
Jiraiya
| Location | Koetsu's Mansion (Kawara Street) |
| Available From | 6-6 |
A mini-game in which you ride on the back of a frog and shoot at targets (look up Jiraiya in Japanese folklore if you're interested in more information). Targets will pop up and move from right-left (or left-right) and you hit them as the appear (and before they leave the screen). As you build up a combo or consecutive hits without missing, the speed will increase (targets move faster).
Controls
| SELECT | Pause |
| START | Controls |
| Throw shuriken | |
| Left Analogue Stick | Move crosshair |

How to play
Basically, you throw a shuriken at targets in order to build up a score - get enough points to reach the pass rank to complete the course. If you destroy the target as soon as it appears, or if you destroy more than one target with a single throw, you get bonus points. When you get consecutive hits, the speed will increase (targets will move faster). Keeping the speed high means you will complete the course faster, which means you will get a time bonus (completing the course faster = more points).
The highest scoring target, the "Koetsu" target, will only appear at its designated location on the course (see courses below) if you arrive there within a certain time. In other words, if you are too slow, it won't appear. Think of it as a reward for doing well. Keep the speed of the course high and the Koetsu target will appear. When you see "Koetsu Target Trigger" in the course tables below, that means you need to arrive at the Koetsu target's location within that time. Note that the Koetsu target does not appear on all courses.

Be careful - there are a couple of targets which will lose you points if you hit them. They look a lot like the real targets so at a glance it can be easy to mess up. For example, the Kumagoro target looks similar to the Bear target and the Girl target looks like the Fox Girl target. Be careful so you don't lose points - just let these targets pass by.
What affects speed
| If you throw a shuriken and it misses a target, the speed goes down by 1. |
| If you get 3 shuriken hits in a row, the speed goes up by 1 (maximum speed is 5). |
Quick Shot Bonus
| If you hit a target immediately after it appears, it will be considered a "Quick Shot" and you get a +50 point bonus. |
Standard Target
100 Points
Red Target

150 Points
Bear

500 Points
Kumagoro
-500 Points
Fox Girl
300 Points
Girl

-300 Points (-900 on the Fire Section course only)
Boar

250 Points
Crow
400 Points
White Crow

800 Points
Koetsu

2000 Points
First Section
| Reward: | Juzumaru |
| Bonus for destroying 2 targets at once |
|---|
| 100 Points |
| Bonus for destroying 3 targets at once |
|---|
| N/A |
Completion time rewards
| 3000 Points | Complete within 1 Minute |
| 2000 Points | Complete within 1 Minute 5 Seconds |
| 1000 Points | Complete within 1 Minute 15 Seconds |
| Koetsu Target Trigger | Reach target within 33 Seconds |
Rank Requirements
| Master | 8000 |
| Advanced (Pass Rank) | 6000 |
| Intermediate | 5000 |
| Beginner | <5000 |


Earth Section
| Reward: | Mikazuki Munechika |
| Bonus for destroying 2 targets at once |
|---|
| 100 Points |
| Bonus for destroying 3 targets at once |
|---|
| N/A |
Completion time rewards
| 3000 Points | Complete within 1 Minute 30 Seconds |
| 2000 Points | Complete within 1 Minute 35 Seconds |
| 1000 Points | Complete within 1 Minute 45 Seconds |
| Koetsu Target Trigger | Reach target within 1 Minute 10 Seconds |
Rank Requirements
| Master | 15500 |
| Advanced (Pass Rank) | 14000 |
| Intermediate | 12000 |
| Beginner | <12000 |


Water Section
| Reward: | Onimaru Kunitsuna |
| Bonus for destroying 2 targets at once |
|---|
| 500 Points |
| Bonus for destroying 3 targets at once |
|---|
| N/A |
Completion time rewards
| 3000 Points | Complete within 1 Minute 25 Seconds |
| 2000 Points | Complete within 1 Minute 30 Seconds |
| 1000 Points | Complete within 1 Minute 40 Seconds |
| Koetsu Target Trigger | Reach target within 1 Minute 5 Seconds |
Rank Requirements
| Master | 18000 |
| Advanced (Pass Rank) | 17000 |
| Intermediate | 15000 |
| Beginner | <15000 |


Fire Section
| Reward: | Dojigiri Yasutsuna |
| Bonus for destroying 2 targets at once |
|---|
| 500 Points |
| Bonus for destroying 3 targets at once |
|---|
| N/A |
Completion time rewards
| 3000 Points | Complete within 1 Minute 30 Seconds |
| 2000 Points | Complete within 1 Minute 35 Seconds |
| 1000 Points | Complete within 1 Minute 40 Seconds |
| Koetsu Target Trigger | N/A |
Rank Requirements
| Master | 17000 |
| Advanced (Pass Rank) | 16000 |
| Intermediate | 14000 |
| Beginner | <14000 |


Air Section
| Reward: | Otenta |
| Bonus for destroying 2 targets at once |
|---|
| 500 Points |
| Bonus for destroying 3 targets at once |
|---|
| N/A |
Completion time rewards
| 3000 Points | N/A |
| 2000 Points | N/A |
| 1000 Points | N/A |
| Koetsu Target Trigger | Reach target within 1 Minute 40 Seconds |
Rank Requirements
| Master | 27000 |
| Advanced (Pass Rank) | 26000 |
| Intermediate | 24000 |
| Beginner | <24000 |


Sky Section
| Reward: | Muramasa |
| Bonus for destroying 2 targets at once |
|---|
| 500 Points |
| Bonus for destroying 3 targets at once |
|---|
| N/A |
Completion time rewards
| 3000 Points | Complete within 1 Minute 37 Seconds |
| 2000 Points | Complete within 1 Minute 39 Seconds |
| 1000 Points | Complete within 1 Minute 40 Seconds |
| Koetsu Target Trigger | Reach target within 1 Minute 5 Seconds |
Rank Requirements
| Master | 27000 |
| Advanced (Pass Rank) | 26000 |
| Intermediate | 23000 |
| Beginner | <23000 |


Extreme Section
| Reward: | Masamune |
| Bonus for destroying 2 targets at once |
|---|
| 500 Points |
| Bonus for destroying 3 targets at once |
|---|
| 1000 Points |
Completion time rewards
| 3000 Points | N/A |
| 2000 Points | N/A |
| 1000 Points | N/A |
| Koetsu Target Trigger | Reach target within 3 Minutes 10 Seconds |
Rank Requirements
| Master | 56000 |
| Advanced (Pass Rank) | 54000 |
| Intermediate | 53000 |
| Beginner | <53000 |


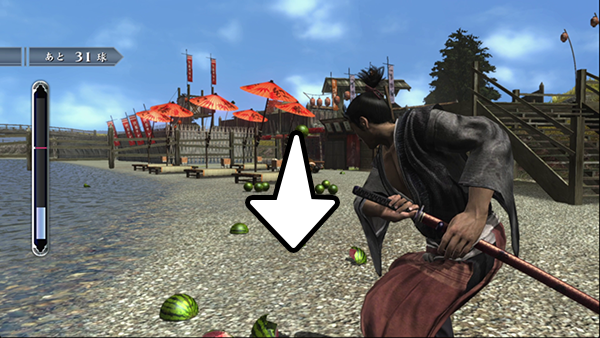
Melon Cutting
| Location | Hozoin Temple (8-8 only), River Road (from 9-1) |
| Available From | 8-8 |
A form of mental training provided by En no Ozuma, intended to improve concentration. He throws various objects at Kiryu (mostly melons), who must time his strikes to destroy the objects and score points.
Controls
| SELECT | Pause |
| START | Controls |
| Swing sword | |
| Left Analogue Stick | Move camera |
| Motion Sensor | Recover from stun |

How to play
You must hit the objects thrown at you. If you time your hit well, your hit grade will be "Great", giving you the most amount of points. You pass if the training gauge is at or above the pass line when you finish the course. Sometimes En no Ozuma will throw objects directly at Kiryu (particularly the bottles). If you fail to hit these objects they will hit Kiryu and stun him. If this happens, you need to make use of the motion controls in the controller by shaking it to reduce stun time.
Types of thrown objects
 |
Melon - The most common thrown object. Gives the least amount of points |
 |
Kusudama - Most rewarding object when hit, both in terms of points earned and amount by which the training gauge increases |
 |
Iron Ball - You only cut these balls in half if you get a "Great" hit grade (so you don't get any points for Okay or Good hits). |
 |
Bottle - These are always thrown directly at Kiryu (Dead Ball pitches only) |
Points
| Object | Okay | Good | Great | Miss |
|---|---|---|---|---|
| Melon | 50 | 100 | 200 | 0 |
| Kusudama | 200 | 500 | 1000 | 0 |
| Iron Ball | 0 | 0 | 500 | 0 |
| Bottle | 100 | 150 | 350 | 0 |
Training Gauge Changes
| Object | Okay | Good | Great | Miss |
|---|---|---|---|---|
| Melon | 70 | 120 | 200 | -250 |
| Kusudama | 80 | 150 | 250 | -450 |
| Iron Ball | 0 | 0 | 400 | -300 |
| Bottle | 80 | 150 | 250 | -250 |
Pitches
Straight
The trajectory of these pitches is straight down the middle of the screen. They are not always pitched at the same speed though.
Arch

The object is thrown up and then archs down, making it quite difficult to follow. Use the left analogue stick to reposition the camera to make it easier to keep track of these pitches.
Curve

Thrown to the left or right, then curves back to the centre.
Dead Ball

Objects are thrown directly at Kiryu, with the intention of hitting him. Bottles are always pitched this way, but sometimes En no Ozuma may pitch an iron ball like this as well, so watch out for that.
NOTEBecause this mini-game takes place outdoors, the time of day affects how it looks. In particular, the objects glow slightly when you play at night, which makes it easier to see them against the dark environment. So, if you are struggling to keep track of the pitches in day time, try playing it at night instead.
Foundational Zeal
| Reward: | Mysteries of the Sword - Single Stream |
Pitches
| Objects | Pitches | ||
|---|---|---|---|
| Total | 40 | Straights | 13 |
| Melons | 33 | Arches | 11 |
| Kusudama | 3 | Left Curves | 8 |
| Iron Balls | 4 | Right Curves | 8 |
| Bottles | 0 | Dead Balls | 0 |
Training Gauge
| Max | 6500 |
| Pass Line | 4200 |
| Initial Amount | 0 |
Rank Requirements
| Man | 9600 |
| Matsu | 8500 |
| Take | 7500 |
| Coward | <7500 |
Applied Zeal
| Reward: | Mysteries of the Sword - Firm Judgment |
Pitches
| Objects | Pitches | ||
|---|---|---|---|
| Total | 50 | Straights | 22 |
| Melons | 41 | Arches | 7 |
| Kusudama | 2 | Left Curves | 9 |
| Iron Balls | 3 | Right Curves | 8 |
| Bottles | 4 | Dead Balls | 4 |
Training Gauge
| Max | 7500 |
| Pass Line | 5000 |
| Initial Amount | 0 |
Rank Requirements
| Man | 10000 |
| Matsu | 9000 |
| Take | 8000 |
| Coward | <8000 |
Developed Zeal
| Reward: | Mysteries of the Sword - Two Heavens |
Pitches
| Objects | Pitches | ||
|---|---|---|---|
| Total | 80 | Straights | 21 |
| Melons | 62 | Arches | 28 |
| Kusudama | 4 | Left Curves | 12 |
| Iron Balls | 13 | Right Curves | 16 |
| Bottles | 1 | Dead Balls | 3 |
Training Gauge
| Max | 9500 |
| Pass Line | 5000 |
| Initial Amount | 0 |
Rank Requirements
| Man | 17000 |
| Matsu | 15500 |
| Take | 14000 |
| Coward | <14000 |
Zeal Special Training [Wild Boar]
| Reward: | Mysteries of the Sword - Dry Leaf Smash |
Pitches
| Objects | Pitches | ||
|---|---|---|---|
| Total | 30 | Straights | 17 |
| Melons | 29 | Arches | 13 |
| Kusudama | 1 | Left Curves | 0 |
| Iron Balls | 0 | Right Curves | 0 |
| Bottles | 0 | Dead Balls | 0 |
Training Gauge
| Max | 5900 |
| Pass Line | 3500 |
| Initial Amount | 0 |
Rank Requirements
| Man | 5700 |
| Matsu | 5000 |
| Take | 4500 |
| Coward | <4500 |
Zeal Special Training [Snake]
| Reward: | Mysteries of the Sword - Escape Strike |
Pitches
| Objects | Pitches | ||
|---|---|---|---|
| Total | 60 | Straights | 15 |
| Melons | 53 | Arches | 10 |
| Kusudama | 3 | Left Curves | 14 |
| Iron Balls | 1 | Right Curves | 18 |
| Bottles | 3 | Dead Balls | 3 |
Training Gauge
| Max | 8000 |
| Pass Line | 4000 |
| Initial Amount | 0 |
Rank Requirements
| Man | 12000 |
| Matsu | 10000 |
| Take | 8000 |
| Coward | <8000 |
Zeal Special Training [Asura]
| Reward: | Mysteries of the Sword - Swallow Drop |
Pitches
| Objects | Pitches | ||
|---|---|---|---|
| Total | 100 | Straights | 22 |
| Melons | 73 | Arches | 14 |
| Kusudama | 10 | Left Curves | 22 |
| Iron Balls | 12 | Right Curves | 25 |
| Bottles | 5 | Dead Balls | 7 |
Training Gauge
| Max | 10000 |
| Pass Line | 5000 |
| Initial Amount | 0 |
Rank Requirements
| Man | 22000 |
| Matsu | 20000 |
| Take | 18500 |
| Coward | <18500 |
Star Actor
| Location | Rakugai |
| Available From | After completing request 32 |
After completing request 32 you can play this whenever you like (Night time only). You dress up kabuki style and get on stage. On the stage, you need to earn money from the audience within a time limit. This is achieved by defeating enemies.
The controls in this mini-game are the same as regular combat, but without the ability to change style.

How to play
The time limit for this mini-game is 2 minutes. Think of this as a regular fight in the game - with the obvious exception here being that the audience throw money to the stage when you defeat enemies. See the table below to see what affects the amount of money that gets thrown. In particular, note that some actions, such as running and dodge-rolling, will reduce the amount of money that gets thrown, so avoid those actions as much as possible. The amount of damage you deal to the enemy when you defeat them (damage of the finishing blow) also affects the amount of money you get. This means it's easier to make money in this mini-game as you level up and increase your power (which increases the amount of damage Kiryu can do). If the time runs out while you are in the middle of performing a heat action, you get a +100 Ryo bonus, which gets added to your earnings (you don't have to pick it up, obviously).
| Description | Effect |
|---|---|
| You receive more money as time passes | 1.5 Ryo every 1 second |
| The more damage your finishing blow does to an enemy, the more you earn | Damage dealt x 0.5 Ryo |
| Defeat an enemy with a heat action for a bonus | +50 Ryo |
| If Kiryu receives damage, you lose money | Damage received x 0.1 Ryo |
| If you run, evade, or roll, you lose money | 1 Ryo for every animation frame |
| You get a special bonus if you run out of time while performing a heat action | +100 Ryo (added to your earnings after finishing) |

The Star Actor Mastery heat action cannot be performed anywhere else in the game besides this mini-game. It has a very long animation, so it's not a good idea to use it since it wastes too much time. However, it's a good one to use as the timer expires (for the 100 Ryo bonus), if you are able to pull it off.
Shogi
| Location | Rakugai/Gion |
| Available From | 5-1 (Trials) / 5-6 (Ranking) |
Basically, this is Asian chess. You checkmate the opponent King in order to win. There are two variations of the Shogi mini-game here. One is the Shogi Trials (available in Gion), where you must win a game from a predetermined starting setup. The other is the Shogi ranking, where you face increasingly challenging opponents in a standard game of Shogi until you work your way up to the top position and defeat the Shogi King.
Controls
| SELECT | Pause |
| START | Controls |
| Replay (Go back a turn) | |
| Select piece / accept | |
| Cancel | |
| Left Analogue Stick / Directional buttons | Move cursor |
| Motion Sensor | Recover from stun |
NOTEDepending on your console region, the and buttons may be swapped.

How to play
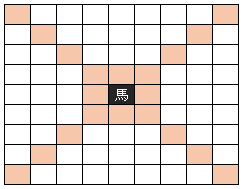
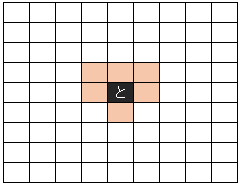
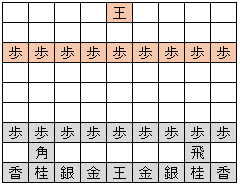
In shogi, players take turns moving their pieces on the board. See below for information about how each piece moves. Rooks and bishops have a wide range of movement but cannot jump over pieces. The knight, however, is able to jump over other pieces. You can make use of your "Replays", which allows you to go back a turn. This is helpful if you make a mistake and want to return to your last turn and try again. Note that there is a limit of 3 replays per game and sometimes (e.g. when playing the highest ranking opponents in shogi ranking) you are not able to use a replay at all.
King

The king can move one space in any direction
Rook

The rook can move as far as possible in a straight line (forward, back, left, right)
Bishop

The bishop can move as far as possible in a diagonal line in any direction
Gold General

The gold general can move one space in any direction forward or sideways, but can only move in a straight line when going back (i.e. can't go diagonally backwards)
Silver General

The silver general can move one space forward (either straight or diagonal) or one step diagonally back
Knight

The knight can move two steps diagonally forward
Lance

The lance can move as far as possible forward (in a straight line)
Pawn

The pawn can move one step forward (in a straight line)
Promotions
When one of your pieces enters the opponent's area, you have the opportunity to "promote" the piece. See below for details (including the different promotion methods and the promoted pieces and their movement). You can choose not to promote a piece if you prefer not to, but once a piece is promoted you cannot demote it.
Promotion rules

| 1 | You can promote a piece that moves forward into the enemy area |
| 2 | You can promote a piece that moves forward while within the enemy area |
| 3 | There are also times when you can promote a piece by going backwards, out of the enemy area |
Dragon King (promoted from Rook)

Movement is a combination of the rook and king pieces
Dragon Horse (promoted from Bishop)
Movement is a combination of the bishop and king pieces
Promoted Silver General

Movement is the same as the gold general
Promoted Knight

Movement is the same as the gold general
Promoted Lance

Movement is the same as the gold general
Promoted Pawn
Movement is the same as the gold general
Shogi Ranking (Rakugai)
Ranking table
| Name | Rank | Replays Allowed |
|---|---|---|
| Seio | Shogi King | No |
| Ho-oh | 10th Dan | No |
| Eisuke | 9th Dan | No |
| Mankichi | 8th Dan | No |
| Kotetsu | 7th Dan | Yes |
| Zenzaburo | 6th Dan | Yes |
| Oyuki | 5th Dan | Yes |
| Danji | 4th Dan | Yes |
| Fujihiko | 3rd Dan | Yes |
| Yujiro | 2nd Dan | Yes |
| Kennosuke | 1st Dan | Yes |
| Jinbei | Rank 1 | Yes |
| Ihei | Rank 1 | Yes |
| Eizaemon | Rank 2 | Yes |
| Genshiro | Rank 2 | Yes |
| Daian | Rank 3 | Yes |
| Ekichi | Rank 3 | Yes |
| Kyubei | Rank 4 | Yes |
| Gonzaemon | Rank 4 | Yes |
| Kyuhei | Rank 5 | Yes |
| Keizo | Rank 5 | Yes |
| Tatsugoro | Rank 6 | Yes |
| Shinemon | Rank 6 | Yes |
| Heikichi | Rank 7 | Yes |
| Yannosuke | Rank 7 | Yes |
| Iwahiko | Rank 8 | Yes |
| Tarosuke | Rank 8 | Yes |
| Torachiyo | Rank 9 | Yes |
| Ofuu | Rank 9 | Yes |
| Mataro | Rank 10 | Yes |
| Nukesaku | Rank 10 | Yes |
Shogi Trials (Gion)
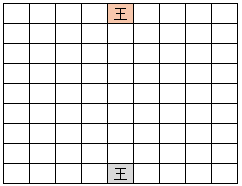
The trials can only be played in Gion (Rakugai is for ranking matches only). These are different from the standard games played in ranking because the starting conditions (i.e. what pieces are set on the board) are predetermined. The trial here is winning the game from a certain starting setup. See below for the initial setups. Where it says something like "Kiryu's Pieces" or "Opponent's Pieces", this refers to the pieces you have on standby and can place wherever you like (you use up a turn to place a piece). Besides the initial setup, the rules are still the same as a standard game of shogi.
Trial 1
| Who starts? | Opponent |
| Replays Allowed? | No |
| Opponent's Pieces | N/A |
| Kiryu's Pieces | N/A |
Trial 2

| Who starts? | Kiryu |
| Replays Allowed? | Yes |
| Opponent's Pieces | N/A |
| Kiryu's Pieces | Pawn x 9 / Lance x 2 / Knight x2 / Bishop / Rook / Silver General x2 / Gold General x2 |
Trial 3

| Who starts? | Determined by initial piece toss |
| Replays Allowed? | Yes |
| Opponent's Pieces | N/A |
| Kiryu's Pieces | N/A |
Trial 4

| Who starts? | Determined by initial piece toss |
| Replays Allowed? | Yes |
| Opponent's Pieces | N/A |
| Kiryu's Pieces | N/A |
Trial 5

| Who starts? | Kiryu |
| Replays Allowed? | No |
| Opponent's Pieces | N/A |
| Kiryu's Pieces | Pawn x2 |
Trial 6

| Who starts? | Kiryu |
| Replays Allowed? | Yes |
| Opponent's Pieces | N/A |
| Kiryu's Pieces | Pawn x9 / Lance x2 / Knight x2 / Bishop / Rook / Silver General x2 / Gold General x2 |
Trial 7
| Who starts? | Determined by initial piece toss |
| Replays Allowed? | Yes |
| Opponent's Pieces | Pawn x9 / Bishop / Rook |
| Kiryu's Pieces | Pawn x9 / Bishop / Rook |
Trial 8

| Who starts? | Opponent |
| Replays Allowed? | Yes |
| Opponent's Pieces | Pawn x2 |
| Kiryu's Pieces | N/A |
Trial 9

| Who starts? | Kiryu |
| Replays Allowed? | Yes |
| Opponent's Pieces | N/A |
| Kiryu's Pieces | N/A |
Trial 10

| Who starts? | Kiryu |
| Replays Allowed? | Yes |
| Opponent's Pieces | N/A |
| Kiryu's Pieces | Knight x2 |
Final Trial

| Who starts? | Kiryu |
| Replays Allowed? | No |
| Opponent's Pieces | Pawn x9 / Lance x2 / Knight x2 / Bishop / Rook / Silver General x2 / Gold General x2 |
| Kiryu's Pieces | Pawn x9 |
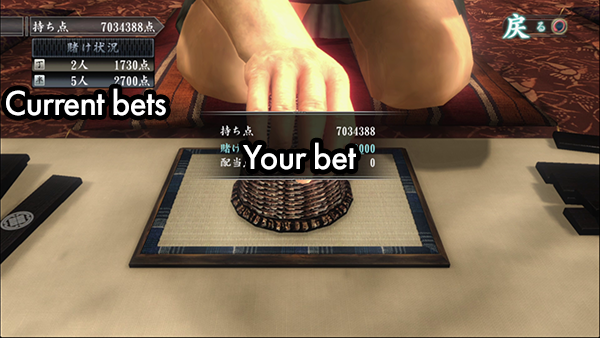
Mahjong
| Location | Rakugai/Gion |
| Available From | 5-1 (Gion) / 5-6 (Rakugai) |
You can think of this as a kind of card game (like poker), but using tiles instead of cards. You need to build a winning "hand" (known as "yaku"). For a full list of hands/yaku, I recommend checking this site. You can use the same site to learn all the rules of this game and various strategies you can use.
Controls
| SELECT | Pause |
| START | Controls |
| Rules | |
| Confirm | |
| Cancel | |
| Action Command | |
| Check discarded tiles | |
| Left Analogue Stick / Directional buttons | Move cursor |
NOTEDepending on your console region, the and buttons may be swapped.

How to play
In Mahjong, you need to create a hand (form "yaku") by replacing tiles one at a time (you can only hold 14 tiles, when you draw a tile you must select one in your hand to discard). You can earn points if you form at least one yaku (a scoring combination). At the end of the match, you are given bonus points or penalties depending on your final rank (e.g. if you are ranked 4th in points at the end, you get a massive penalty, but if you are 1st, you get a big bonus). This means it's possible to gain a lot of money if you win, but you can also lose a lot of money by finishing last. There are different opponent difficulties, so pick easier opponents at first to get used to playing before moving on to the more difficult opponents.
Bonus/Penalty Points
| 1st Place | +25000 points |
| 2nd Place | No bonus/penalty |
| 3rd Place | -10000 points |
| 4th Place | -15000 points |
AI opponent strategies
| Gion Opponent | Strategy |
|---|---|
| Lucky Kamekichi | Gets uradora more easily |
| Greedy Heita | Aims to get the highest scoring hand possible |
| Silent Saheiji | Likes to keep a closed hand and rarely declares riichi |
| Yataro the Kakemawari | Tries to get any scoring hand as soon as possible |
| Clairvoyant Isuke | A strong opponent who is skilled at forming yaku and it's difficult to score a ron win off of him |
| Rakugai Opponent | Strategy |
|---|---|
| Ironclad Jinbei | If someone declares riichi, he tries to escape it |
| Shamisen Ogin | Will play his own game and focus on his own yaku, even if someone declares riichi |
| Otome the Cricket | Likes to form yaku by declaring pon or chi |
| Yoichi the Strong Wind | Tries to get any scoring hand as soon as possible |
| Shigeichi the Buddha | A strong opponent who is skilled at forming yaku and it's difficult to score a ron win off of him |
Adjustable rules
| Half Game / East Wind Game | Changes the length of a match. In the East Wind mode, the game ends after each player has dealt once (so it could be regarded as a quarter game). In Half Game mode, each player deals twice. |
| Open Tanyao | Determines whether the tanyao yaku can be scored with an open hand. If it's set to open, it is possible to form a tanyao yaku by declaring pon or chi on an opponent's discarded tile (thus making your hand/tanyao open). If it's set to closed, it is not possible to do this (i.e. if you open your hand, it is not possible to score a tanyao yaku). |
| Double Binding | If the dealer has won 5 times in a row, a player cannot win unless they get a yaku with a score of at least 2 han. The idea of this is to prevent quick and easy wins by getting low scoring yaku (1 han yaku). But it is rare for anyone to get 5 wins in a row. |
| Uradora | Decide whether to use the red coloured tiles. If this is on, the red tiles are included in the game. In gameplay, these are counted like normal dora tiles, so if you have them in your hand it's easier to get a higher scoring hand. |
Hanafuda
| Location | Rakugai/Gion |
| Available From | 5-1 (Gion) / 5-6 (Rakugai) |
This game uses traditional Japanese "flower cards" (hanafuda). Specifically, this is the game known as "koi-koi". You form card combinations, known as "yaku", to earn points. At the end of the game, points are converted to wooden tags. If you win, you gain tags based on how many more points you have than your opponent. If you lose, you lost tags instead. For a full list of yaku, I recommend checking this site. You can use the same site to learn all the rules of this game and various strategies you can use.
Controls
| SELECT | Pause |
| START | Controls |
| See list of yaku | |
| Confirm | |
| Cancel | |
| Left Analogue Stick / Directional buttons | Move cursor |
NOTEDepending on your console region, the and buttons may be swapped.

How to play
First, you determine the rules of the game, then once you start playing it proceed in the manner outlined in the "Koi Koi Structure" table shown here. When you score a yaku, be wise in your judgment about whether to declare koi koi or to end the round there with your win. Declaring koi koi can result in bigger scores, if you are able to score additional yaku, but if your opponent scores a yaku and ends the round you don't get any points, even if their yaku was 1 point and you scored 20+ points with your various yaku. So, it's a big gamble. If it looks like your opponent has a good chance of getting yaku after you declare koi koi (check their taken cards section), it may be wise to end the round when you win a yaku. On the other hand, if you have a strong hand and you are confident you can win more points before your opponent gets a yaku, then it's an excellent way to build up even more points.
Adjustable Rules
| Tsukimizake / Hanamizake | Determines whether to allow the tsukimizake and hanamizake yaku. These two yaku are high scoring and very easy to get. So, on the one hand this could be a good way to earn quick and easy points. On the other hand, your opponent could just as easily get these yaku. |
| Rounds | Determines the number of rounds you play before the game ends |
| Rate | Determines the payout at the end of the game. It relates to the amount of wooden tags a point is worth. In other words, the higher this is, the more tags you earn if you win. On the other hand, if you lose it means you lose more tags. |
Opponents
| Difficulty | Maximum Rate | Conditions |
|---|---|---|
| Easy | 200 | Available from the start |
| Intermediate | 400 | Available from the start |
| Advanced | 600 | Avaialble after winning 10 times on easy or intermediate difficulty |
| Expert | 1000 | Available after winnings 5 times on advanced difficulty |
[Note that draws count towards the total win count]
Koi Koi Structure
| 1: Determine the parent |
|---|
| Pick from a choice of 2 cards. If you pick the earlier month, you are the parent. If you pick the later month, the opponent is the parent. The parent changes based on who wins a round (e.g. if you are the parent and your opponent wins a round, they become the parent in the next round) |
| 2: What you can do on your turn |
|---|
| Take a field card: If you have a card in your hand of the same suite as one on the field, you can match the two and place both in your "taken cards" section |
| Place a card from your hand on the field: If you select a card from your hand which does not match with any card on the field (i.e. is a different suite), you place that card on the field. Note that doing this means your opponent will be able to take this card on their next turn |
| 3: Draw from the deck |
|---|
| After doing one the actions outlined in step 2 above, you then draw one card from the deck. If this card is the same suite as a card on the field, you may take that field card (along with the drawn card) and place it in your taken cards section. If it does not match any of the cards on the field, it is placed on the field |
| 4: If you score a yaku |
|---|
| Declare Koi Koi: You can take the gamble and continue the game after scoring a yaku. Doing this could allow you to build up even more yaku and gain more points, but you run the risk of earning no points if your opponent scores a yaku and ends the round |
| End the round: If you don't declare koi koi, you end the round and gain whatever points you have accumulated in that round |
| 5: End of the game |
|---|
| At the end of the game, the points are converted into wooden tags. Then, the difference between you and your opponent is calculated and paid out accordingly. E.g. if you finish with more points than your opponent, you will gain wooden tags at the end, but you lose wooden tags if you have less points than your opponent. The calculation for this is: Points x Rate |
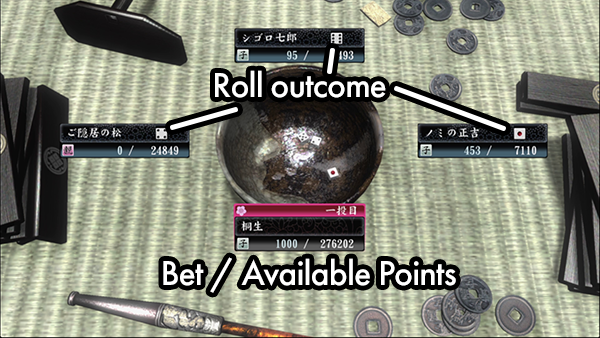
Odds and Evens
| Location | Gion |
| Available From | 5-1 |
Controls
| SELECT | Pause |
| START | Controls |
| Use item | |
| Confirm | |
| Cancel | |
| See outcome history | |
| Left Analogue Stick / Directional buttons | Move cursor |
NOTEDepending on your console region, the and buttons may be swapped.
How to play
The dealer will roll dice in a cup and place it on the ground. You then place bet on either an odd number result or even number result (you can also bet on the specific number of one or both of the dice). It's a 50-50 chance to guess right, but the payout depends on how many other players have bet (e.g. if everyone bets on odd and the result is odd, the payout is split among all of the players, whereas if only one person bets odd they get the full payout). The payout for correctly guessing the specific number on one/both dice is bigger, though obviously the chance of guessing correctly is a lot lower. When you have played 25 rounds, you can battle one-on-one with the dice roller. It works like a usual round but no one else places bets and your payout will double each time you guess correctly. Don't get too carried away though - if you guess wrong, you don't get any payout and the duel ends. Each time you guess correctly you get the option to continue or leave it there and collect your payout. Then, it goes back to the regular gameplay with the other players. The maximum bet you can place increases as you progress in the story, as long as you have won a certain number of times (see below for details).
Duel with the dice roller
When dueling one-on-one with the dice roller, it is possible to win a maximum of 5 times in a row. When the dice roller attempts to cheat, you'll get a quick time event. If you press the displayed button in time, Kiryu spots the foul play and the dice roller has to re-roll. However, if you fail the QTE, your chance of winning drops by 50%.
Gambling calculations
| Bet | Payout Calculation | Available from |
|---|---|---|
| Odd/Even | ((Losers Combined Bet x 0.9 / Winners Combined Bet) + 1) x Kiryu's Bet | Start |
| Outcome of one die | ((Losers Combined Bet x 0.9 / Winners Combined Bet) + 2) x Kiryu's Bet | After winning 5 times |
| Outcome of both dice | Total bets from all players | After winning 15 times |
| Duel with the dice roller | Double your current points every time you win | After winning 25 times |
Maximum bet
| Start of the game | 1000 |
| 6-1, plus you have won 10 times | 1500 |
| 9-1, plus you have won 20 times | 2000 |
| 12-1, plus you have won 30 times | 3000 |
Cheat Items
| Item | How to Obtain | Effect |
|---|---|---|
| Hanjiro Amulet | Inventor | The next outcome will be odd |
| Chogoro Beads | Inventor | The next outcome will be even |
| Pinzoro Tag | Inventor / Request 46 reward | The next roll will be a pinzoro (both dice will land on 1) |
| Gambler's Tobacco | Inventor / Shogi Ranking reward (10th Dan) | For the next 3 turns, your chance of winning increases by 30% |
Cee-Lo
| Location | Gion/Rakugai |
| Available From | 5-1 (Gion) / 5-6 (Rakugai) |
Controls
| SELECT | Pause |
| START | Controls |
| Use item | |
| Confirm bet / Throw dice | |
| Cancel | |
| See rules and possible dice rolls | |
| Left Analogue Stick / Directional buttons | Move cursor |
NOTEDepending on your console region, the and buttons may be swapped.
How to play
In this game, the parent rolls first and sets a target. The children then roll. If someone beats the parent's roll, the parent pays out to that child. If the parent beats a child, the parent collects that child's bet. If the parent gets a roll that cannot be beaten (e.g. a 6) the parent automatically wins and the children don't even roll. It's a pretty simple game and it's all luck-based. If you are the parent, get a better roll than any of the children. If you are a child, get a better roll than the parent (you don't need to worry about the rolls of the other children).
Roll Outcomes
| 2-2-4 | The exact numbers are just an example. This is the most basic roll - if 2 of your dice are the same number, your roll becomes the value of the 3rd die. In this example, your roll will be a 4. If you had 4-4-2, your roll would be a 2. 6-6-1 is a roll of 1. And so on. If you score a 6 as the parent, it's an auto-win. If you score a 1 as the parent, it's an auto-lose. |
| 1-3-6 | The exact numbers are just an example. If after 3 rolls you don't get any roll listed on this table, you don't get a score at all on your outcome (in practice this is the equivalent of rolling a 1). |
| 1-1-1 | The best possible roll, called a "Pinzoro". If you roll this, your payout is multiplied by 5 (this roll is another auto-win if you are the parent). |
| 2-2-2 to 6-6-6 | If you roll a triple (with the exception of triple 1s), this is called an "Arashi". If you win with this roll (and if you get 6-6-6 as the parent, it's an auto-win), your payout is tripled. |
| 4-5-6 | This roll is called a "Shigoro". If you roll this, your payout is doubled (this is another auto-win roll for the parent). |
| 1-2-3 | The worst possible roll, called a "Hifumi". If you roll this as the dealer, it's an auto-lose. You pay double your bet to the parent (if you are a child) or all 3 children receive double their bet from you (if you are the parent). |
Typical game of Cee-Lo
| 1: The children place bets |
|---|
| 2: The parent rolls first |
|---|
| If the parent gets an instant win roll, the round ends immediately and the parent receives payment from all 3 children |
| If the parent gets an instant lose roll, the parent pays out to all 3 children |
| 3: Children roll one at a time (only if the parent does not get an instant win/lose roll) |
| If the child gets a special roll (Pinzoro, Arashi, Shigoro), they defeat the parent and receive payment from the parent (at the end of the round) |
| If the child's roll is higher than the parent's roll, the child receives payment from the parent. |
| If the child's roll is lower than the parent's roll, the parent receives the child's bet. |
Opponent available points and maximum bets
| Condition | Opponent's Available Points | Maximum Bet |
|---|---|---|
| Start of game | 10000 | 1000 |
| From 6-1 (and have won at least 10 rounds) | 15000 | 1500 |
| From 9-1 (and have won at least 15 rounds) | 18000 | 1800 |
| From 12-1 (and have won at least 20 rounds) | 20000 | 2000 |
Cheat Items
| Item | How to Obtain | Effect |
|---|---|---|
| Shigoro Dice | Inventor | You will roll a shigoro on your next throw |
| Pinzoro Dice | Inventor | You will roll a pinzoro on your next throw |
| Arashi Yokan | Inventor / Request 37 reward | You will roll an arashi on your next throw |
| Hifumi Tobacco | Inventor | All other players will roll a hifumi in the round in which this item is used |
| Shonben Jizo | Inventor | All other players will roll a shonben in the round in which this item is used (shonben is when at least one of the dice lands outside the bowl) |


