KHHsubs
Yujo
Overview
The process with yujo is outlined in the table provided here. The objective is to max out the heart gauge of a yujo and unlock their substory. You can continue to visit yujo after completing their substory (for example, if you want to play the mini-games), but you don't get anything more for doing so.
Remember that at first you cannot get the heart gauge above 10. Winning mini-games against the yujo will increase the max hearts on the gauge.
Yujo Completion Steps
| 1 | First meeting (Heat gauge can only go up to 10) |
| 2 | Increase heart gauge to at least 6 to play a mini-game |
| 3 | Win mini-game to increase max gauge to 15 hearts |
| 4 | Get the heart gauge up to 11 and go on date |
| 5 | Have a successful date to increase max gauge to 20 hearts |
| 6 | Max out the gauge (fill all 20 hearts) and unlock the yujo's substory |
| 7 | Complete yujo's substory |
Equipment and Handsomeness
The equipment Kiryu wears has an influence over a hidden attribute in the game - handsomeness. See the table below to see how different equipment affects this attribute. The handsomeness modifiers don't have any effect when you meet a yujo for the first time. However, from the 2nd meeting onwards, the handsomeness attribute affects the heart gauge (can make it go up or down).
Items that increase handsomeness
| Item | Handsomeness |
|---|---|
| Man's Sarashi | +2 |
| Sarashi | +1 |
| Shichifuku Sarashi | +7 |
| Sacred Tree Armour | +6 |
| Seamless Raiment | +10 |
| Dragon Katabira | +4 |
| Dragon Sarashi | +3 |
| Dragon Armour | +5 |
| Runner's Shoes | +2 |
| Large Tengu Fan | +2 |
| Lucky Beads | +5 |
| Gion Inari Talisman | +2 |
| Hariti Amulet | +3 |
| Rising Dragon Inro | +10 |
| Beautiful Woman Shunga | +2 |
| Tiger Skin Obi | +2 |
| European Men's Sachet [1] | +3 |
| Shoes of Good Health | +3 |
| Yasaka Shrine Talisman | +1 |
| Yoichi Talisman | +3 |
| Resurrection Stone | +4 |
| Deer Antler Netsuke | +5 |
[1] For Shirayuki only, this has the effect of -10 handsomeness rather than the usual +3 boost.
Handsomeness Effects on Yujo
| Yujo | 16+ Handsomeness | 6-15 Handsomeness | 0-5 Handsomeness |
|---|---|---|---|
| Kinuyo | +1 | +0.5 | No effect |
| Suzukaze | +1 | +0.5 | No effect |
| Momochika | +1.25 | +0.75 | No effect |
| Hinagiku | +0.75 | +0.25 | No effect |
| Hanamaru | +1.5 | +1 | No effect |
| Shirayuki | +1 | No effect | -0.25 |
| Asagiri | +1 | No effect | -0.5 |
Ordering and Intoxication
When you visit a yujo, you have the option to order food and drink. Depending on what you order, the yujo's heart gauge may go up or down (see the individual yujo sections on this page for full details). Also, if you drink any alcohol, Kiryu's intoxication level rises. If your intoxication level hits 950 (maximum intoxication is 999), which is a high level 5 intoxication, Kiryu gets too drunk and ends up getting kicked out of the brothel, immediately ending your session with the yujo. In addition, getting drunk and kicked out like this will lower the yujo's heart gauge. So, be careful not to drink too much when you visit them.
Note that if you order nothing, the heart gauge will always go down by -0.25. So, if you choose to skip both the food and drink ordering, the heart gauge will go down by -0.5. Bear that in mind when trying to build up the heart gauge. It's always worth ordering something to ensure the gauge doesn't drop.

If you get your intoxication level up to level/stage 5, but with a lower intoxicity value than 950 (so, between 800-949), the yujo's heart gauge will increase by +2. However, if you get drunk and kicked out of the brothel, the heart gauge will decrease by -1
Conversations and Extensions
After ordering food and drink, you then have dialogue with the yujo. The yujo will say something, then you get a choice of 3 responses to what she said. Depending on your response, the yujo's heart gauge may go up or down (see the individual yujo sections on this page for full details). The heart gauge influences the number of dialogues you get in a yujo meeting. In the first meeting, you only get 2. After that, it goes up to 3 and opens up the ability to extend your stay. When you extend, you pay the yujo fee a second time and also get to order food and drink again.
Also note that when the heart gauge gets to specific amounts, you unlock special dialogues that only ever trigger once. You have to see these special dialogues in order to trigger the yujo's substory (even if you have 20 hearts, if you haven't seen and responded to the special dialogue, the substory won't trigger).
Sometimes, you may end up drinking a bowl of sake as a result of dialogue. When this happens, your intoxicity increases by anywhere between 300-600. Be careful, because you could end up getting too intoxicated and kicked out the brothel.
Heart Gauge and Dialogue
| Heart Gauge | Dialogues |
|---|---|
| First Meeting | 2 |
| 0 - 5 | 3 |
| 6 - 10 | 4 |
| 11 - 15 | 5 |
| 16 - 20 | 6 |
Dates
When you get a yujo's heart gauge up to 11 hearts, she will invite you out for a date. Her kamuro will deliver a letter to you saying where she is waiting. If you get to her within 2 minutes, the heart gauge goes up by +1. On the other hand, if you get to her after 10 minutes, the heart gauge goes down by -3.
When you meet her, you then get a choice of where to take her and then choose food or a gift (depending on the location) with which to treat her. If you give her something she does not like, the date will be regarded as a failure. However, if you give her something she likes, the two of you return to the brothel and a new session starts with the yujo (but this time, the session fee is waived).
Also, if you are in the process of building up the heart gauge of more than one yujo, there is a chance that you encounter one of the others while you are out on a date with a yujo, which is a bit awkward. When this happens, you get a dialogue option. If you are able to explain yourself out of that situation, then nothing happens and everyone just moves on. However, if you answer badly, the heart gauge decreases by -3 (which yujo's gauge goes down depends on the answer you give - see below).
Encouter Details
| 1 | To encouter another yujo, you must have visited that yujo in the brothel at least once and you also have not completed her substory |
| 2 | You only experience each encounter a single time |
| 3 | If you can get yourself out of the situation with a good excuse, there are no heart gauge changes, but if you give a bad answer the heart gauge goes down by -3 (the answer you give determines which yujo's heart gauge decreases) |
| 4 | Asagiri is the only yujo who has no encounters (she doesn't appear in any and you can't meet any other yujo while on a date with her). This is because in order to have your first session with Asagiri, you must complete the substories of all the other yujo. |
Encounter Dialogue
| Encounter with Shirayuki at Koyoro | Heart Gauge Change |
|---|---|
| Option 1 | -3 (Shirayuki) |
| Option 2 | -3 (Kinuyo) |
| Option 3 | No change |
| Encounter with Hanamaru at Hatsukaze | Heart Gauge Change |
|---|---|
| Option 1 | -3 (Hanamaru) |
| Option 2 | No change |
| Option 3 | -3 (Kinuyo) |
| Encounter with Suzukaze at Ginya | Heart Gauge Change |
|---|---|
| Option 1 | -3 (Suzukaze) |
| Option 2 | -3 (Kinuyo) |
| Option 3 | No change |
| Encounter with Momochika at Arigataya | Heart Gauge Change |
|---|---|
| Option 1 | No change |
| Option 2 | -3 (Kinuyo) |
| Option 3 | -3 (Momochika) |
| Encounter with Momochika at Koyoro | Heart Gauge Change |
|---|---|
| Option 1 | -3 (Suzukaze) |
| Option 2 | -3 (Momochika) |
| Option 3 | No change |
| Encounter with Kinuyo at Hatsukaze | Heart Gauge Change |
|---|---|
| Option 1 | -3 (Kinuyo) |
| Option 2 | -3 (Suzukaze) |
| Option 3 | No change |
| Encounter with Hanamaru at Ginya | Heart Gauge Change |
|---|---|
| Option 1 | No change |
| Option 2 | -3 (Hanamaru) |
| Option 3 | -3 (Suzukaze) |
| Encounter with Hinagiku at Arigataya | Heart Gauge Change |
|---|---|
| Option 1 | No change |
| Option 2 | -3 (Hinagiku) |
| Option 3 | -3 (Suzukaze) |
| Encounter with Suzukaze at Koyoro | Heart Gauge Change |
|---|---|
| Option 1 | -3 (Suzukaze) |
| Option 2 | No change |
| Option 3 | -3 (Momochika) |
| Encounter with Hinagiku at Hatsukaze | Heart Gauge Change |
|---|---|
| Option 1 | -3 (Hinagiku) |
| Option 2 | No change |
| Option 3 | -3 (Momochika) |
| Encounter with Kinuyo at Ginya | Heart Gauge Change |
|---|---|
| Option 1 | -3 (Kinuyo) |
| Option 2 | -3 (Momochika) |
| Option 3 | No change |
| Encounter with Shirayuki at Arigataya | Heart Gauge Change |
|---|---|
| Option 1 | No change |
| Option 2 | -3 (Momochika) |
| Option 3 | -3 (Shirayuki) |
| Encounter with Hanamaru at Koyoro | Heart Gauge Change |
|---|---|
| Option 1 | No change |
| Option 2 | -3 (Hanamaru) |
| Option 3 | -3 (Hinagiku) |
| Encounter with Suzukaze at Hatsukaze | Heart Gauge Change |
|---|---|
| Option 1 | -3 (Suzukaze) |
| Option 2 | No change |
| Option 3 | -3 (Hinagiku) |
| Encounter with Momochika at Ginya | Heart Gauge Change |
|---|---|
| Option 1 | -3 (Momochika) |
| Option 2 | -3 (Hinagiku) |
| Option 3 | No change |
| Encounter with Shirayuki at Arigataya | Heart Gauge Change |
|---|---|
| Option 1 | -3 (Hinagiku) |
| Option 2 | -3 (Shirayuki) |
| Option 3 | No change |
| Encounter with Kinuyo at Koyoro | Heart Gauge Change |
|---|---|
| Option 1 | -3 (Kinuyo) |
| Option 2 | No change |
| Option 3 | -3 (Hanamaru) |
| Encounter with Shirayuki at Hatsukaze | Heart Gauge Change |
|---|---|
| Option 1 | -3 (Hanamaru) |
| Option 2 | No change |
| Option 3 | -3 (Shirayuki) |
| Encounter with Hinagiku at Ginya | Heart Gauge Change |
|---|---|
| Option 1 | -3 (Hinagiku) |
| Option 2 | No change |
| Option 3 | -3 (Hanamaru) |
| Encounter with Suzukaze at Arigataya | Heart Gauge Change |
|---|---|
| Option 1 | -3 (Suzukaze) |
| Option 2 | -3 (Hanamaru) |
| Option 3 | No change |
| Encounter with Hanamaru at Koyoro | Heart Gauge Change |
|---|---|
| Option 1 | -3 (Hanamaru) |
| Option 2 | -3 (Shirayuki) |
| Option 3 | No change |
| Encounter with Hinagiku at Hatsukaze | Heart Gauge Change |
|---|---|
| Option 1 | -3 (Hinagiku) |
| Option 2 | No change |
| Option 3 | -3 (Shirayuki) |
| Encounter with Kinuyo at Ginya | Heart Gauge Change |
|---|---|
| Option 1 | -3 (Kinuyo) |
| Option 2 | No change |
| Option 3 | -3 (Shirayuki) |
| Encounter with Momochika at Arigataya | Heart Gauge Change |
|---|---|
| Option 1 | -3 (Momochika) |
| Option 2 | -3 (Shirayuki) |
| Option 3 | No change |
Kinuyo
Brothel Yumejiya
Session Fee 2500 Mon
Rank Kakoi
Birthday 11th October
Bust/Waist/Hip 84/56/85
Hobbies Haiku
About Kinuyo
She was betrayed by her husband and became a yujo to pay off his debts. Because of this experience, she struggles to open up to men. She has not been a yujo for long so she lacks the refined skills of her more experienced peers, but there's something about her naivety and inexperience that some find charming, so she is popular with some customers. She is easily moved to tears and tends to be self-deprecating.
See substory 1 for details on Kinuyo's substory (triggered after getting her heart gauge up to 20 hearts).
Ordering and Gifts
| Drink | Price | Intoxication | Heart Gauge |
|---|---|---|---|
| Green Tea | Free | -150 ~ -50 | No change |
| Orange Water | 50 Mon | -50 ~ 0 | No change |
| Blackcurrent Orange Sake | 100 Mon | 100 ~ 200 | +0.5 |
| Malt Sake | 200 Mon | 150 ~ 250 | -0.25 |
| Flaming Shochu | 800 Mon | 350 ~ 450 | +0.5 |
| Amber European Sake | 2000 Mon | 200 ~ 400 | -0.5 |
| Maiden's Amazake | 3000 Mon | 100 ~ 120 | +0.5 |
| Snowy Wind Refined Sake | 5000 Mon | 150 ~ 350 | +0.5 |
| Sugoroku Unrefined Sake | 8000 Mon | 200 ~ 300 | +1 |
| Celebration Sake | 1 Ryo | 200 ~ 500 | +0.5 |
| Food | Price | Intoxication | Heart Gauge |
|---|---|---|---|
| Picked Vegetables | 30 Mon | -10 | +0.5 |
| Red and White Manju | 50 Mon | -20 | No change |
| Dried Squid | 80 Mon | -5 | -0.25 |
| Fresh Vegetables | 100 Mon | -30 | No change |
| Nori Wasabi Sea Bream Chazuke | 200 Mon | -70 | +1 |
| Boiled Kyoto Vegetables | 300 Mon | -40 | +0.5 |
| Sparrow Yakitori | 400 Mon | -60 | -0.5 |
| Fruit Serving | 500 Mon | -50 | No change |
| Seafood Funamori | 800 Mon | -80 | No change |
| Broiled Tuna Head | 1000 Mon | -90 | -0.25 |
Gifts
| Likes (Heart Gauge +1) | Red Hairpin / Princess Kaguya's Comb / Flower-Pattern Incense Burner / Kyoto Women's Sachet / Silver Plate / Gold Comb / Vermillion Hairpin / Rising Dragon Inro / European Cloth / Foreign Coin / Jade Obidome / Tortoiseshell Hairpin / Crane Kimono / Village Tribute |
| Loves (Heart Gauge +2) | Gold Plate / Grid-Pattern Obi / Potted Chrysanthemum |
Conversations
NOTEThe dialogue options are random (with the exception of the special dialogue options, which trigger at specific points). Because of this, translating the dialogue below isn't going to be very helpful. Instead, I am providing the Japanese text. In the header you will see the yujo's dialogue. The rows below are the 3 options from which you can choose. Use the Japanese text below to match what you're seeing on the screen in game. It might be a bit tedious, but there is no time limit when selecting an option so you can take your time.
Regular Dialogue
| 一度、大門の内に入ったら、二度と表には出られないと思うけど。。。 | Heart Gauge Change |
|---|---|
| 身請けされると出られる | -1 |
| こっそり抜け出す | No change |
| それが遊女の宿命 | +1 |
| 後ろめたい気持ちなどは、あるんでしょうか? | Heart Gauge Change |
|---|---|
| 何年も同じ女だと飽きる | -1 |
| それが男の本能だ | No change |
| ときめきが欲しいだけだ | +1 |
| うちには正直理解できません。。。 | Heart Gauge Change |
|---|---|
| この町は夢の国みたいなものだから | +1 |
| それは男の性というやつだ | No change |
| そんなことは知るわけがない | -1 |
| うちは、夫と別れてからは、あまり男性を信じることができないんどす。。。 | Heart Gauge Change |
|---|---|
| そんなのは俺の自由だ | No change |
| 随分気の早い話だ | +1 |
| その時になったら分かる | -1 |
| ええ。うちを指名してくれるお客様は、いつもツケといて、と言ってくる | Heart Gauge Change |
|---|---|
| それは完全に騙されてる | +1 |
| ちゃんと請求した方がいい | No change |
| そんなことは自分で考えろ | -1 |
| ええ。でも、何の振りをつけたらいいのか、分からなくて。。。 | Heart Gauge Change |
|---|---|
| 舞の振り | No change |
| 惚れた振り | -1 |
| 喜んでいる振り | +1 |
| ええ。平べったくで、こそこそ動き回るんどす。 | Heart Gauge Change |
|---|---|
| 珍しい虫だな | No change |
| 田舎は自然が豊かだからな | +1 |
| その虫はここにもいる | -1 |
| 表の綺麗の紅葉を見ると、故郷のことを思い出します。。。 | Heart Gauge Change |
|---|---|
| 故郷はどこなんだ? | -1 |
| 昔ばかりを振り返るな | +1 |
| 嫌なことでもあったのか? | No change |
| 桐生はん、どうしたら殿方が喜ぶか、教えてくれませんか? | Heart Gauge Change |
|---|---|
| 明るい笑顔を見せること | No change |
| 聞き上手になること | +1 |
| その帯を解くこと | -1 |
| 桐生はんの好みの人は、どんな人なんどすか? | Heart Gauge Change |
|---|---|
| 清楚な女 | No change |
| 謙虚な女 | +1 |
| 淫らな女 | -1 |
| 桐生はんは、どんな祭りが好きなんどすか? | Heart Gauge Change |
|---|---|
| 祇園祭り | +1 |
| 喧嘩祭り | No change |
| 裸祭り | -1 |
| 桐生はんは。。。おいくつなんどすか? | Heart Gauge Change |
|---|---|
| こう見えて十五歳 | No change |
| こう見えて六十歳 | +1 |
| 歳なんて関係ない | -1 |
| 実際、他の殿方のお相手した際、どうすればいいのか分かりません。。。 | Heart Gauge Change |
|---|---|
| 客に身を任せればいい | No change |
| じっと黙ってればいい | -1 |
| 俺に聞く話ではない | +1 |
| そうしたら、いきなり二度と来るか、と怒ってしまって。。。 | Heart Gauge Change |
|---|---|
| まずそうに見えたから | No change |
| それは帰れと言う意味だから | +1 |
| 手抜き料理に呆れたから | -1 |
| そんで、実家は小物売りをしてるんどす。 | Heart Gauge Change |
|---|---|
| 道理で品があると思った | +1 |
| 礼儀作法だけでは駄目だ | -1 |
| 小物とはどんなものだ? | No change |
| 食べると美味しくて、笑いが止まらなくなってしまいますからね。 | Heart Gauge Change |
|---|---|
| 本当に好きなんだな | +1 |
| どういうきのこだ? | No change |
| 食べたら、まずいだろ | -1 |
| 「女房の味は可もなく不可もなし」だったかしら。。。 | Heart Gauge Change |
|---|---|
| どういう意味だ? | No change |
| その句はもう忘れた方がいい | +1 |
| それはバレ句というものだ | -1 |
| 飲みすぎると、記憶を失ってしまって、何も覚えてないんどす。。。 | Heart Gauge Change |
|---|---|
| 別に無理に飲まなくていい | +1 |
| もしかして酒乱なのか? | -1 |
| じゃあ試してみるか? | No change |
| 独り寂しい時に使いなさいと言われたんどすが、どう使ったら良いのか | Heart Gauge Change |
|---|---|
| お祭りでかぶるもの | -1 |
| 魔除けに使うもの | No change |
| 締め付け具合を鍛えるもの | +1 |
| 他にも若くて可愛い遊女がいるというのに。。。 | Heart Gauge Change |
|---|---|
| もっと自信を持ったらどうだ? | +1 |
| 遊女らしくないところがいい | No change |
| 酸いも甘いも知ってそうだから | -3 |
| 元人妻だからって、周りからは、からかわれてるんどす。。。 | Heart Gauge Change |
|---|---|
| そんなことは気にするな | +1 |
| 客に向かって言うことではない | No change |
| 俺は元人妻の方が燃える | -1 |
Special Dialogue
| After getting the heart gauge up to 11 hearts | |
|---|---|
| でも、本当は、いつか前の夫が迎えに来てくれると、心のどこかで | Heart Gauge Change |
| そんな薄情な男のことは忘れろ | +1 |
| 今でも前の夫を信じているのか? | -1 |
| 運が悪かったんだよ、お前らは | No change |
| After getting the heart gauge up to 16 hearts | |
|---|---|
| だから、お父様の言うとおりに、結婚したんどすが。。。 | Heart Gauge Change |
| それは良かったな | -3 |
| 馬鹿げた話だ | +3 |
| 悲しい結果に終わったな | No change |
| After getting the heart gauge up to 20 hearts | |
|---|---|
| 遊女の元へ行った夫のために。。。まさか、自分が遊女になるなんて。。。 | Heart Gauge Change |
| 皮肉なものだ | +2 |
| 情けない男だ | No change |
| 笑い話だ | -1 |
Date
On her date, Kinuyo wants to go to Hatsukaze. The heart gauge will go up by +1 if you go there. There are also plenty of food you can order there which will increase the heart gauge even further. Going to Koyoro boosts the heart gauge too, but the meals there are more expensive. If you want the cheapest option, you could go to the sushi restaurant. The heart gauge doesn't go up when you select that place, but when you order something she likes it will increase by the same amount it does at any of the other places.
| Place | Heart Gauge | Food/Items that increase the heart gauge by +1 |
|---|---|---|
| Koyoro | +0.5 | Yama no Sachi Banquet for 2 / Ume Banquet for 2 |
| Hatsukaze | +1 | Rikyu Egg for 2 / Egg Iridashi for 2 / Clam Meat Rice for 2 / Adzuki Rice for 2 / Boiled Tofu for 2 |
| Ginya | No change | Futomaki for 2 / Mackerel Oshizushi for 2 |
| Arigataya | -1 | Princess Kaguya's Comb / Grid-Pattern Obi / European Cloth / Kyoto Women's Sachet |

If you go somewhere the yujo does not like, or order/buy something she doesn't like, or if you don't have enough money, you fail the date and the heart gauge drops.
Suzukaze

Brothel Yumejiya
Session Fee 2500 Mon
Rank Kakoi
Birthday 27th January
Bust/Waist/Hip 87/57/85
Hobbies Calligraphy, Arithmetic
About Suzukaze
She was born in Gion and taught the ways of the yujo from a young age. She has beauty, intelligence, and is a skilled artist. Suzukaze dreams of surpassing her mother, who herself was a famous yujo. She has good self-esteem and regards herself as something of an intellectual. She has a half-sister, Hinagiku, who works as a yujo at the brothel Azamiya.
See substory 2 for details on Suzukaze's substory (triggered after getting her heart gauge up to 20 hearts).
Ordering and Gifts
| Drink | Price | Intoxication | Heart Gauge |
|---|---|---|---|
| Green Tea | Free | -150 ~ -50 | -0.25 |
| Orange Water | 50 Mon | -50 ~ 0 | No change |
| Blackcurrent Orange Sake | 100 Mon | 100 ~ 200 | +0.5 |
| Malt Sake | 200 Mon | 150 ~ 250 | No change |
| Flaming Shochu | 800 Mon | 350 ~ 450 | -0.5 |
| Amber European Sake | 2000 Mon | 200 ~ 400 | No change |
| Maiden's Amazake | 3000 Mon | 100 ~ 120 | +1 |
| Snowy Wind Refined Sake | 5000 Mon | 150 ~ 350 | No change |
| Sugoroku Unrefined Sake | 8000 Mon | 200 ~ 300 | No change |
| Celebration Sake | 1 Ryo | 200 ~ 500 | -0.5 |
| Food | Price | Intoxication | Heart Gauge |
|---|---|---|---|
| Picked Vegetables | 30 Mon | -10 | No change |
| Red and White Manju | 50 Mon | -20 | +0.5 |
| Dried Squid | 80 Mon | -5 | -0.25 |
| Fresh Vegetables | 100 Mon | -30 | No change |
| Nori Wasabi Sea Bream Chazuke | 200 Mon | -70 | No change |
| Boiled Kyoto Vegetables | 300 Mon | -40 | +0.5 |
| Sparrow Yakitori | 400 Mon | -60 | No change |
| Fruit Serving | 500 Mon | -50 | +1 |
| Seafood Funamori | 800 Mon | -80 | -0.5 |
| Broiled Tuna Head | 1000 Mon | -90 | No change |
Gifts
| Likes (Heart Gauge +1) | Red Hairpin / Castella / Mechanical Doll / Flower-Pattern Incense Burner / Kyoto Women's Sachet / Gold Candy / Golden Hairpin / Silver Plate / Konpeito / Cherry Blossom Kimono / Vermillion Hairpin / Rising Dragon Inro / Potted Chrysanthemum / Foreign Coin / Jade Obidome / Hina Doll Empress / Tortoiseshell Hairpin / Portuguese Hand Mirror / Village Tribute |
| Loves (Heart Gauge +2) | Gold Plate / Gold Comb |
Conversations
NOTEThe dialogue options are random (with the exception of the special dialogue options, which trigger at specific points). Because of this, translating the dialogue below isn't going to be very helpful. Instead, I am providing the Japanese text. In the header you will see the yujo's dialogue. The rows below are the 3 options from which you can choose. Use the Japanese text below to match what you're seeing on the screen in game. It might be a bit tedious, but there is no time limit when selecting an option so you can take your time.
Regular Dialogue
| あれ?桐生はんは、年増の方がお好きなんどすか? | Heart Gauge Change |
|---|---|
| 女は年齢で決まるわけではない | +2 |
| やはり若いに越したことはない | No change |
| 精力があれば何でもいい | -2 |
| いや、ちょっと聞いてみたいだけどす。 | Heart Gauge Change |
|---|---|
| しょっちゅう来ている | +1 |
| 実は店を間違えていた | -1 |
| 付き合いで来るくらい | No change |
| うち、果物盛りが食べとうございます。 | Heart Gauge Change |
|---|---|
| 好きなものを頼んでいい | No change |
| 次の機会までおあずけ | +1 |
| 舟や果物より女体がいい | -3 |
| うちには、面倒を見てくれた先輩の遊女もいまへんし。。。 | Heart Gauge Change |
|---|---|
| 俺が何とかしてやる | +1 |
| 我慢するしかねえな | No change |
| 涼風にも問題があると思うぞ | -2 |
| うちは、そんな助平な人は嫌いどす。 | Heart Gauge Change |
|---|---|
| 艶やかな着物だなと思って | +2 |
| きゃしゃだなと思って | -1 |
| 美味しそうだなと思って | No change |
| うちはまだ鹿恋なんどすけど、ここ祇園の遊女の最上格は何ていうか | Heart Gauge Change |
|---|---|
| 天神 | -1 |
| 女神 | No change |
| 太夫 | +1 |
| うちもいつかは母を越える遊女になりたいどす。 | Heart Gauge Change |
|---|---|
| もっと芸を磨くべきだ | +1 |
| まず態度を改めるべきだ | -1 |
| まず男を知るべきだ | -3 |
| ええ。まぁ、うちを指名したってことはうちみたいな女が好みなんどす? | Heart Gauge Change |
|---|---|
| 涼風のような容姿端麗な女 | No change |
| 涼風のような教養のある女 | +1 |
| 涼風のような色っぽい女 | -1 |
| ええ。よく、ほかのお客はんから、美味しいと聞かされるんどす。 | Heart Gauge Change |
|---|---|
| 食べたら太るぞ | No change |
| 俺が作ってやる | +2 |
| もっと美味しいものがある | -2 |
| 悲しいことに、最近は客層も変わり、あまりそういった芸は | Heart Gauge Change |
|---|---|
| だったら色気で勝負すればいい | -1 |
| 確かに芸を分かる客が少ない | +2 |
| だったら芸を変えてみればいい | -2 |
| 桐生はんなら、どんな言葉を書かれますの? | Heart Gauge Change |
|---|---|
| 朝雲暮雨 | +2 |
| 色即是空 | No change |
| 傾城傾国 | -1 |
| 桐生はんは、何をお願いします? | Heart Gauge Change |
|---|---|
| 世の中が平和でありますように | No change |
| 涼風との縁が続きますように | +1 |
| 神頼みなんて俺はしない | -1 |
| 桐生はんは。。。どういったお仕事されてますの? | Heart Gauge Change |
|---|---|
| 無職だが文句あるか? | No change |
| 御大尽さまとは何だ? | -1 |
| 龍屋を知らないの? | +1 |
| 最近、遊女を狙った盗人がうろついてるようなんどす。 | Heart Gauge Change |
|---|---|
| 遊女はうろつくものではない | No change |
| 店でおとなしくしてた方がいい | +1 |
| その盗人にも訳がある | -1 |
| すんまへん、掛け持ちが多くて、休む暇もありまへん。 | Heart Gauge Change |
|---|---|
| 無理して頑張るからだ | No change |
| 何かの流行り病か? | -2 |
| ここで寝てればいい | +2 |
| 鶴と亀がおります。頭の数が十、足の数が三十二本になるには | Heart Gauge Change |
|---|---|
| 鶴が六羽で亀が四匹 | -1 |
| 鶴が七羽で亀が三匹 | -1 |
| 鶴が四羽で亀が六匹 | +1 |
| 特に薔薇という花が、うちは好きどすえ。 | Heart Gauge Change |
|---|---|
| あの香りには癒される | +1 |
| あの香りは興奮する | No change |
| まるで涼風と同じだ | -1 |
| なんや、えらい固い顔してはりますけど、うちやと、居心地悪いどすか? | Heart Gauge Change |
|---|---|
| 慣れないので緊張している | +1 |
| いくら金が掛かるか心配だ | -1 |
| 生まれつきの顔だ | -1 |
| まぁ、いやなら、聞き流して結構どす。 | Heart Gauge Change |
|---|---|
| 独り身で金もある | +1 |
| もしかして、ほれてるのか | No change |
| 黙って接客しろ | -2 |
| もちろん、遊女のたしなみとして、仕事前にもお風呂に入ってから | Heart Gauge Change |
|---|---|
| 今度湿泉に連れてってやる | -1 |
| 風呂は健康にもいいからな | +1 |
| 今度背中を流してやろうか? | No change |
| 遊女たるもの、しょせんは大門の中でしか、生きることができない | Heart Gauge Change |
|---|---|
| 今を大切に生きたらいい | -2 |
| 自分の居場所は自分で作るもの | No change |
| 俺ならそんな心配はさせない | +2 |
Special Dialogue
| After getting the heart gauge up to 11 hearts | |
|---|---|
| 桐生はんの顔を見ると。。。何だか胸の奥が熱くなるんどす。 | Heart Gauge Change |
| 俺も同じ気持ちだ | +2 |
| なかなかうまい事を言う | -1 |
| どこか病気なのか? | -3 |
| After getting the heart gauge up to 16 hearts | |
|---|---|
| 今は、あざみ屋という揚屋で、ひな菊という名で遊女をしてはります | Heart Gauge Change |
| 妹がいてうらやましい | No change |
| 姉妹揃って遊女とは大したものだ | -1 |
| 何か訳がありそうだ | +2 |
| After getting the heart gauge up to 20 hearts | |
|---|---|
| うちのこと、どう思ってる?まじめに答えておくれやす。 | Heart Gauge Change |
| 遊女としては最高の女だ | -2 |
| 素直に俺の女にしたい | +2 |
| やっぱり金がかかる女だ | -3 |
Date
Suzukaze has a particular preference - the heart gauge will only increase when you visit Koyoro. The food here is a bit expensive compared to other places, but going here and ordering something she likes will give you +2 to her heart gauge. If you want to save money you can visit Hatsukaze, though note that she only likes one food item from that menu (see table below).
| Place | Heart Gauge | Food/Items that increase the heart gauge by +1 |
|---|---|---|
| Koyoro | +1 | Yama no Sachi Banquet for 2 / Ume Banquet for 2 / Take Banquet for 2 / Shiko no Zen Banquet for 2 |
| Hatsukaze | No change | Boiled Tofu for 2 |
| Ginya | -1 | Kabayaki for 2 / Steamed Sushi for 2 |
| Arigataya | -1 | Golden Hairpin / Cherry Blossom Kimono / Portuguese Hand Mirror / Kyoto Women's Sachet |

Even if you visit somewhere she doesn't like, dropping the gauge by -1, if you order/buy something she likes from there it will increase the gauge by +1 so in the end that means there was no change to the heart gauge.
Momochika

Brothel Yumejiya
Session Fee 5000 Mon
Rank Tenjin
Birthday 9th June
Bust/Waist/Hip 91/60/88
Hobbies Gambling, Eating
About Momochika
Momochika is perhaps the most glamorous yujo in Gion. She loves men and voluntarily became a yujo. She loves gambling and most of the money she earns goes towards that hobby. She responds well to vulgar topics of conversation, so focus on those kinds of responses in the dialogues with her.
See substory 3 for details on Momochika's substory (triggered after getting her heart gauge up to 20 hearts).
Ordering and Gifts
| Drink | Price | Intoxication | Heart Gauge |
|---|---|---|---|
| Green Tea | Free | -150 ~ -50 | -0.5 |
| Orange Water | 50 Mon | -50 ~ 0 | -0.5 |
| Blackcurrent Orange Sake | 100 Mon | 100 ~ 200 | -0.25 |
| Malt Sake | 200 Mon | 150 ~ 250 | No change |
| Flaming Shochu | 800 Mon | 350 ~ 450 | +1 |
| Amber European Sake | 2000 Mon | 200 ~ 400 | +0.5 |
| Maiden's Amazake | 3000 Mon | 100 ~ 120 | -0.25 |
| Snowy Wind Refined Sake | 5000 Mon | 150 ~ 350 | +0.5 |
| Sugoroku Unrefined Sake | 8000 Mon | 200 ~ 300 | +0.5 |
| Celebration Sake | 1 Ryo | 200 ~ 500 | +1 |
| Food | Price | Intoxication | Heart Gauge |
|---|---|---|---|
| Picked Vegetables | 30 Mon | -10 | No change |
| Red and White Manju | 50 Mon | -20 | -0.5 |
| Dried Squid | 80 Mon | -5 | +0.5 |
| Fresh Vegetables | 100 Mon | -30 | No change |
| Nori Wasabi Sea Bream Chazuke | 200 Mon | -70 | +0.5 |
| Boiled Kyoto Vegetables | 300 Mon | -40 | No change |
| Sparrow Yakitori | 400 Mon | -60 | +0.5 |
| Fruit Serving | 500 Mon | -50 | -0.25 |
| Seafood Funamori | 800 Mon | -80 | +1 |
| Broiled Tuna Head | 1000 Mon | -90 | +0.5 |
Gifts
| Likes (Heart Gauge +1) | Arashi Yokan / Stylish Kiseru / Itami Refined Sake / Imozake / Edo Women's Sachet / Dutch Box / Flower-Pattern Incense Burner / Gold Plate / Gold Comb / Satsuma Shochu / Shigoro Dice / Gambler's Tobacco / Rising Dragon Inro / Shonben Jizo / Beautiful Woman Shunga / Potted Chrysanthemum / Chogoro Beads / Unrefined Sake / Nada Refined Sake / Mara Morohaku / Foreign Coin / Fireworks Kimono / Hanjiro Amulet / Hina Doll Emperor / Pinzoro Dice / Pinzoro Tag / Mirin / Picture of a Warrior / Village Tribute / Picture of an Actor |
| Loves (Heart Gauge +2) | Mechanical Doll / Glass Kiseru / Gold Leather Tobacco Case / Golden Hairpin / Cherry Blossom Kimono / Gold Kiseru / Jomon Pottery |
Conversations
NOTEThe dialogue options are random (with the exception of the special dialogue options, which trigger at specific points). Because of this, translating the dialogue below isn't going to be very helpful. Instead, I am providing the Japanese text. In the header you will see the yujo's dialogue. The rows below are the 3 options from which you can choose. Use the Japanese text below to match what you're seeing on the screen in game. It might be a bit tedious, but there is no time limit when selecting an option so you can take your time.
Regular Dialogue
| あて、今の自分の体を春画に描いてもらいたいと思ってますのえ。 | Heart Gauge Change |
|---|---|
| よほど自信があるんだな | No change |
| それはちょっと妬ける | +1 |
| 俺が描いてやろうか? | -1 |
| いつになったら、あてを身請けしてくれる旦那さまが現れるんかなぁ | Heart Gauge Change |
|---|---|
| 俺が身請けするとでも思うのか | -5 |
| 身請け話なんていくらでもある | No change |
| 身請けなんてやめろ | +2 |
| 腕っ節も強そうで。。。あては強い男が好きなんどすえ | Heart Gauge Change |
|---|---|
| そういう桃千佳は色っぽい | No change |
| そうやって客を誘惑するのか | -1 |
| 強いのは腕っ節だけじゃない | +1 |
| うふんっ。。。とぼけちゃって。 | Heart Gauge Change |
|---|---|
| こう見えて自信がある | No change |
| 相手にもよるな | +1 |
| あっちゃってどっちだ? | -1 |
| お酒は強い方なんどすか? | Heart Gauge Change |
|---|---|
| 実はべろんべろん | -1 |
| ちょっと酔いが回ってきた [This will increase your intoxication level] | +1 |
| 水みたいなものだ [This will increase your intoxication level] | No change |
| 桐生はんの。。。将来の夢はなんどすの? | Heart Gauge Change |
|---|---|
| 武士道を極めたい | +1 |
| 水墨画を極めたい | No change |
| 田舎でひっそり隠居 | -1 |
| 桐生はん、どうやって女を口説くんどすか? | Heart Gauge Change |
|---|---|
| まずは文通から始める | -1 |
| いろんな贈り物をする | No change |
| とりあえず押し倒す | +1 |
| 桐生はんは。。。女の体でどこが一番好きどすえ? | Heart Gauge Change |
|---|---|
| 豊満な胸 | +1 |
| 引き締まった尻 | No change |
| ちらりと見える太もも | -1 |
| 桐生はんは浮気については、どう思います? | Heart Gauge Change |
|---|---|
| 恥ずべき行為だ | No change |
| 迷惑かけなきゃいい | -1 |
| 本気になれば関係ない | +1 |
| 桐生はんはどんなのが楽しいと思いますえ? | Heart Gauge Change |
|---|---|
| お手玉 | No change |
| 松葉相撲 | +1 |
| ずいずいずっころばし | -1 |
| 最近、あてより歳の若い遊女が出てきてますけど、男も知らんような子と | Heart Gauge Change |
|---|---|
| 俺には良さが分からない | +1 |
| 幼いならではの良さがある | No change |
| それは単なるひがみだろ? | -1 |
| そうどす。いっちばん、感じるところどすえ。 | Heart Gauge Change |
|---|---|
| 耳たぶ | +1 |
| 足の裏 | -1 |
| そんなの決まってる | -2 |
| 大金賭けたときのゾクゾク感がたまらんのどすわ | Heart Gauge Change |
|---|---|
| それは完全に病気だ | -1 |
| 確かにゾクゾクくる | No change |
| 俺も今すぐ刺激が欲しい | +1 |
| だから、毎日、大好きな鰻を毎日食べてるんどす。。。 | Heart Gauge Change |
|---|---|
| よく飽きないな | No change |
| 腹に何か飼ってるな | -1 |
| 精力が有り余ってるな | +1 |
| ちょっと声を上げたって。。。誰にも聞こえまへんえ | Heart Gauge Change |
|---|---|
| 瞑想するにはもってこいだ | No change |
| じゃあ大声上げさせてやる | +2 |
| 何が目的なんだ? | -2 |
| でも、あっちも馬ぐらいあったりして | Heart Gauge Change |
|---|---|
| 人並みだと思う | No change |
| 祇園の暴れ馬と呼ばれている | +1 |
| 塩をふったような大根だ | -1 |
| 。。。どんな詫び入れしたと思います? | Heart Gauge Change |
|---|---|
| 土下座 | -1 |
| まげ切り | +1 |
| 去勢 | No change |
| なんか簡単に賢くなる方法があったらええのになぁ。。。 | Heart Gauge Change |
|---|---|
| 桃千佳じゃ厳しい | -1 |
| 日頂の努力しかない | No change |
| 俺が個人授業してやる | +1 |
| なんでか分かります? | Heart Gauge Change |
|---|---|
| お金が儲かるから | No change |
| いろんな芸が身につくから | -1 |
| 男が好きでたまらないから | +1 |
| ほら。。。もう、こんなに脈が上がって。。。 | Heart Gauge Change |
|---|---|
| 医者を呼んだ方がいい | +1 |
| それは心の病だ | -1 |
| 安い女は嫌いだ | No change |
| 無理やり後ろから抱きつかれて。。。着物をはぎ取られて。。。 | Heart Gauge Change |
|---|---|
| 俺がそいつをぶっ飛ばしてやる | +1 |
| そんな格好で歩いてるのが悪い | -1 |
| 続きを聞かせてくれ | -1 |
Special Dialogue
| After getting the heart gauge up to 11 hearts | |
|---|---|
| 家族も誰もおらん。。。あてには拠り所がどこにもないんどす。。。 | Heart Gauge Change |
| 俺が拠り所になってやる | +3 |
| 色仕掛けがうまうな | -1 |
| ここに来る客たちがいるだろ | No change |
| After getting the heart gauge up to 16 hearts | |
|---|---|
| ほな、今度一緒に行きまへんか? | Heart Gauge Change |
| 博打は嫌いだ | No change |
| 賭場に迷惑をかけてしまう | +1 |
| その賭場と、ぐるなのか? | -3 |
| After getting the heart gauge up to 20 hearts | |
|---|---|
| こんな借金にまみれたあてでも。。。愛してくれますか? | Heart Gauge Change |
| 借金なんて関係ない | +3 |
| 借金の額にもよる | No change |
| そんなの無理に決まってる | -2 |
Date
Momochika prefers to visit the sushi restaurant, which is great because the prices there are low. There's no need to visit anywhere else, since only the sushi restaurant will increase the heart gauge just by visiting there, so you get the benefit of +2 to the heart gauge (visiting there and ordering something she likes) along with the bonus of all the food being cheap.
| Place | Heart Gauge | Food/Items that increase the heart gauge by +1 |
|---|---|---|
| Koyoro | -1 | Umi no Sachi Banquet for 2 |
| Hatsukaze | No change | Rikyu Egg for 2 / Eel Kabayaki for 2 / Turtle Hot Pot for 2 |
| Ginya | +1 | Mackerel Oshizushi for 2 / Kabayaki for 2 / Mackerel Sushi for 2 / Kohada Sushi for 2 / Steamed Sushi for 2 / Ayu Sushi for 2 |
| Arigataya | No change | Golden Hairpin / Fireworks Kimono / Cherry Blossom Kimono / Dutch Box / Edo Women's Sachet |
She really doesn't like Koyoro, so if you do go there make sure you order the one thing she likes, or you'll get -2 heart gauge overall and the date will be a failure.
Hinagiku

Brothel Azamiya
Session Fee 1500 Mon
Rank Kakoi
Birthday 18th May
Bust/Waist/Hip 79/59/80
Hobbies Dancing
About Hinagiku
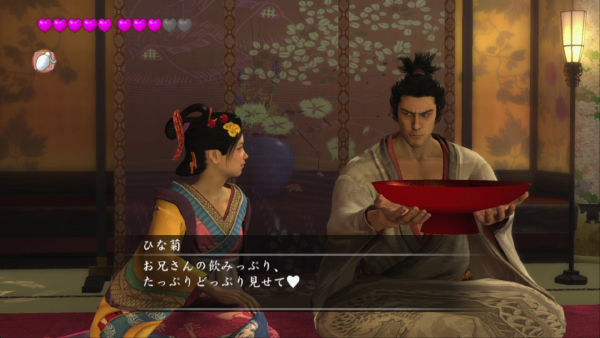
The child of a yujo and her lover. Her mother died after her birth and she was raised by the owner of Azamiya. She is the youngest yujo in a brothel full of young yujo. She doesn't like it when people talk to her as if she's a child, so avoid those kinds of responses and instead treat her as an equal. She is the half-sister of Suzukaze at Yumejiya.
See substory 4 for details on Hinagiku's substory (triggered after getting her heart gauge up to 20 hearts).
Ordering and Gifts
| Drink | Price | Intoxication | Heart Gauge |
|---|---|---|---|
| Green Tea | Free | -150 ~ -50 | +0.5 |
| Orange Water | 50 Mon | -50 ~ 0 | +1 |
| Blackcurrent Orange Sake | 100 Mon | 100 ~ 200 | No change |
| Malt Sake | 200 Mon | 150 ~ 250 | -0.25 |
| Flaming Shochu | 800 Mon | 350 ~ 450 | -0.5 |
| Amber European Sake | 2000 Mon | 200 ~ 400 | -0.25 |
| Maiden's Amazake | 3000 Mon | 100 ~ 120 | No change |
| Snowy Wind Refined Sake | 5000 Mon | 150 ~ 350 | -0.25 |
| Sugoroku Unrefined Sake | 8000 Mon | 200 ~ 300 | -0.5 |
| Celebration Sake | 1 Ryo | 200 ~ 500 | -0.25 |
| Food | Price | Intoxication | Heart Gauge |
|---|---|---|---|
| Picked Vegetables | 30 Mon | -10 | -0.5 |
| Red and White Manju | 50 Mon | -20 | No change |
| Dried Squid | 80 Mon | -5 | -0.5 |
| Fresh Vegetables | 100 Mon | -30 | -0.25 |
| Nori Wasabi Sea Bream Chazuke | 200 Mon | -70 | -0.25 |
| Boiled Kyoto Vegetables | 300 Mon | -40 | -0.25 |
| Sparrow Yakitori | 400 Mon | -60 | +0.5 |
| Fruit Serving | 500 Mon | -50 | +1 |
| Seafood Funamori | 800 Mon | -80 | +0.5 |
| Broiled Tuna Head | 1000 Mon | -90 | -0.25 |
Gifts
| Likes (Heart Gauge +1) | Red Hairpin / Dutch Box / Princess Kaguya's Comb / Castella / Flower-Pattern Incense Burner / Gold Candy / Silver Plate / Vermillion Hairpin / Rising Dragon Inro / Potted Chrysanthemum / Wave-Pattern Obi / Foreign Coin / Jade Obidome / Hina Doll Emperor / Tortoiseshell Hairpin / Portuguese Hand Mirror / Crane Kimono / Village Tribute |
| Loves (Heart Gauge +2) | Mechanical Doll / Flower-Pattern Obi / Gold Plate / Gold Comb / Konpeito / Hina Doll Empress |
Conversations
NOTEThe dialogue options are random (with the exception of the special dialogue options, which trigger at specific points). Because of this, translating the dialogue below isn't going to be very helpful. Instead, I am providing the Japanese text. In the header you will see the yujo's dialogue. The rows below are the 3 options from which you can choose. Use the Japanese text below to match what you're seeing on the screen in game. It might be a bit tedious, but there is no time limit when selecting an option so you can take your time.
Regular Dialogue
| あそこ、丑三つ時に狼の霊が出るらしいどす。 | Heart Gauge Change |
|---|---|
| 油揚げを持っていけ | +1 |
| 霊ならそこにいる | No change |
| 幽霊なんていない | -1 |
| いつも、舞のお師匠さんに𠮟られてばっかり。。。 | Heart Gauge Change |
|---|---|
| 舞が下手糞だから | +1 |
| 態度が悪いからだ | -1 |
| ひな菊の若さに嫉妬している | No change |
| 生まれ変わるとしたら、お兄さんはあ、何になりたいどすか? | Heart Gauge Change |
|---|---|
| 猫 | No change |
| 鳥 | -1 |
| 女 | +1 |
| うん。何か頼んでもええどすか? | Heart Gauge Change |
|---|---|
| 好きなものを頼めばいい | +1 |
| 俺の腹は別に減ってない | -1 |
| ちょっと強引すぎないか? | No change |
| ええ。最近、ほとんど寝てまへん。 | Heart Gauge Change |
|---|---|
| ここで寝たらどうだ? | +1 |
| 俺が添い寝をしてやろう | -1 |
| 仕事を減らしたらどうだ? | No change |
| お月さんには、うさぎが住んでるって、聞いたことがあるんどすが | Heart Gauge Change |
|---|---|
| 本当だ | -1 |
| そんな訳がない | No change |
| うさぎではなく人が住んでいる | +1 |
| お兄さん、教えてくれはります? | Heart Gauge Change |
|---|---|
| そんなことは俺も知らない | No change |
| ここよりもっと質素な暮らしだ | +1 |
| 普通に家の手伝いしてる | -1 |
| お兄さんは、どうしてひなを指名したんどすか? | Heart Gauge Change |
|---|---|
| 明るい子だと思った | No change |
| 妹が欲しかった | +1 |
| 一番安そうだった | -1 |
| お兄さんは、何か特技あります? | Heart Gauge Change |
|---|---|
| 一気飲み [This will increase your intoxication level] | +3 |
| 皿回し | -1 |
| 腹踊り | No change |
| ここの料理も美味しいどすけど、ひなの料理はもっと美味しいどす。 | Heart Gauge Change |
|---|---|
| 今度食べさせてくれ | +1 |
| どんな料理が得意なんだ? | No change |
| それは言いすぎだ | -1 |
| じゅばんだけでええのに。 | Heart Gauge Change |
|---|---|
| 着物を着こなすのも遊女の格だ | No change |
| よくそんな重いものを着てるな | +1 |
| じゅばんだけでいいと思う | -1 |
| だって、お兄さんも大きいな胸の方が好きやと思って。 | Heart Gauge Change |
|---|---|
| 揉みまくればいい | No change |
| たくさん飯を食えばいい | +1 |
| 俺は洗濯板に梅干しのほうが好き | -1 |
| ちょっと、ええどすか?お兄さんはお酒強いんどすか? | Heart Gauge Change |
|---|---|
| 強い、砂糖水みたいなもの | No change |
| 普通、強くも弱くもない [This will increase your intoxication level] | +3 |
| 弱い、飲むと記憶を失う | -1 |
| でも、女将さんから怒られるから、困ってるんどす。 | Heart Gauge Change |
|---|---|
| 勉強なんて必要ない | No change |
| 生きていく上で必要なことだ | -1 |
| まずは好きのなることだ | +1 |
| でも、店が違うから、商売敵なんどすわ。 | Heart Gauge Change |
|---|---|
| 今度紹介してくれ | -1 |
| どっちが商売上手だ? | No change |
| 一度見てみたい | +1 |
| ひなにも分からないんどす。。。こないだは、着物の袖に針が入ってて | Heart Gauge Change |
|---|---|
| そんな意地悪くらい耐えろ | +1 |
| 意地悪した遊女はどこだ? | -1 |
| お返しに針を仕込んでやれ | No change |
| ひなの将来は、沢山子供を作ることどす。 | Heart Gauge Change |
|---|---|
| ちょっと気が早いな | -1 |
| 家計が大変だ | No change |
| 旦那が心配だ | +1 |
| ひなは、一生、金平糖だけで生きていけますえ。 | Heart Gauge Change |
|---|---|
| 酒が大好物 | -1 |
| 金が大好物 | +1 |
| 女が大好物 | -1 |
| ほな、しょーじきに答えてや。ひなのこと、どう思ってる? | Heart Gauge Change |
|---|---|
| やっぱり子供 | +1 |
| 心は子供でも体は大人 | -1 |
| 歳の割りに綺麗な女 | No change |
| ものすごく大きくて、力持ちで、毛むくじゃらで、色が白いらしい | Heart Gauge Change |
|---|---|
| それは間違いだ | No change |
| 近寄らない方がいい | -1 |
| 見たところでどうするんだ? | +1 |
| よく男の人から聞くんどすが、筆おろしって何どすか? | Heart Gauge Change |
|---|---|
| 新品の筆を慣らすこと | +1 |
| 習字の方法のひとつ | -1 |
| 少年から大人になる儀式 | No change |
Special Dialogue
| After getting the heart gauge up to 11 hearts | |
|---|---|
| ひなもいつかは、お母さんを越える太夫になってやろうと思います。 | Heart Gauge Change |
| ひな菊ならきっとなれる | +1 |
| そんなに焦る必要はない | No change |
| 太夫になんかなるものではない | -1 |
| After getting the heart gauge up to 16 hearts | |
|---|---|
| お兄さんは。。。ひなを一人の女として見てくれてるんやろか。。。 | Heart Gauge Change |
| 可愛い妹として | No change |
| 一人の女として | +1 |
| 俺の母親として | -1 |
| After getting the heart gauge up to 20 hearts | |
|---|---|
| ひながもっと太夫っぽい感じになったら、お兄さんと連れ添って | Heart Gauge Change |
| 十分大人だ | +3 |
| 今は娘みたいだ | -3 |
| 今のままでいい | No change |
Date
Hinagiku prefers gifts from Arigataya. Going there will boost the heart gauge by +1 and the cheapest item she likes that will boost the gauge up by another +1 costs 1000 Mon. If you want to save money you could go to the sushi restaurant and order something she likes to get a total increase of +1.5 - you can order something for just 100 Mon at this restaurant and still get the heart gauge boost.
| Place | Heart Gauge | Food/Items that increase the heart gauge by +1 |
|---|---|---|
| Koyoro | No change | Umi no Sachi Banquet for 2 |
| Hatsukaze | -0.5 | Kotori Zosui for 2 |
| Ginya | +0.5 | Futomaki for 2 / Barazushi for 2 / Wakame Wakizushi for 2 |
| Arigataya | +1 | Princess Kaguya's Comb / Flower-Pattern Obi / Wave-Pattern Obi / Portuguese Hand Mirror / Dutch Box |

The amount of money you spend at Arigataya makes no difference - if she likes the item the heart gauge will always go up by +1 - so there's no point spending any more money than you have to.
Hanamaru

Brothel Azamiya
Session Fee 1500 Mon
Rank Kakoi
Birthday 5th March
Bust/Waist/Hip 86/57/84
Hobbies Playing the Koto, Shogi
About Hanamaru
Her father had a serious illness, so she became a yujo to cover his medical fees. She has unique skin for a yujo and this brings in a lot of customers, who come for her unique appearance. She loves humour and likes to have a laugh. However, she gets gloomly when her father becomes the topic of conversation.
See substory 5 for details on Hanamaru's substory (triggered after getting her heart gauge up to 20 hearts).
Ordering and Gifts
| Drink | Price | Intoxication | Heart Gauge |
|---|---|---|---|
| Green Tea | Free | -150 ~ -50 | No change |
| Orange Water | 50 Mon | -50 ~ 0 | +0.5 |
| Blackcurrent Orange Sake | 100 Mon | 100 ~ 200 | +1 |
| Malt Sake | 200 Mon | 150 ~ 250 | No change |
| Flaming Shochu | 800 Mon | 350 ~ 450 | -0.25 |
| Amber European Sake | 2000 Mon | 200 ~ 400 | No change |
| Maiden's Amazake | 3000 Mon | 100 ~ 120 | +0.5 |
| Snowy Wind Refined Sake | 5000 Mon | 150 ~ 350 | -0.5 |
| Sugoroku Unrefined Sake | 8000 Mon | 200 ~ 300 | -0.25 |
| Celebration Sake | 1 Ryo | 200 ~ 500 | No change |
| Food | Price | Intoxication | Heart Gauge |
|---|---|---|---|
| Picked Vegetables | 30 Mon | -10 | No change |
| Red and White Manju | 50 Mon | -20 | -0.25 |
| Dried Squid | 80 Mon | -5 | +1 |
| Fresh Vegetables | 100 Mon | -30 | +0.5 |
| Nori Wasabi Sea Bream Chazuke | 200 Mon | -70 | +1 |
| Boiled Kyoto Vegetables | 300 Mon | -40 | +0.5 |
| Sparrow Yakitori | 400 Mon | -60 | -0.25 |
| Fruit Serving | 500 Mon | -50 | -0.25 |
| Seafood Funamori | 800 Mon | -80 | No change |
| Broiled Tuna Head | 1000 Mon | -90 | -0.5 |
Gifts
| Likes (Heart Gauge +1) | Red Hairpin / Stylish Kiseru / Edo Women's Sachet / Dutch Box / Mechanical Doll / Flower-Pattern Incense Burner / Golden Hairpin / Silver Plate / Cherry Blossom Kimono / Rising Dragon Inro / Potted Chrysanthemum / Wave-Pattern Obi / Foreign Coin / All-Purpose Pill - Ultimate / Jade Obidome / Tortoiseshell Hairpin / Village Tribute |
| Loves (Heart Gauge +2) | Glass Kiseru / Gold Leather Tobacco Case / Gold Plate / Gold Kiseru / Fireworks Kimono |
Conversations
NOTEThe dialogue options are random (with the exception of the special dialogue options, which trigger at specific points). Because of this, translating the dialogue below isn't going to be very helpful. Instead, I am providing the Japanese text. In the header you will see the yujo's dialogue. The rows below are the 3 options from which you can choose. Use the Japanese text below to match what you're seeing on the screen in game. It might be a bit tedious, but there is no time limit when selecting an option so you can take your time.
Regular Dialogue
| 。。。医者になりたいんどす。 | Heart Gauge Change |
|---|---|
| 無理に決まってるだろ | -1 |
| それには努力が必要だ | +1 |
| どう突っ込めばいいんだ? | No change |
| 今はこうして平和どすけど、いつかまたああやって、戦が始まったり | Heart Gauge Change |
|---|---|
| また戦は始まるはずだ | No change |
| もう当分は無いだろうな | +1 |
| 今も俺は戦の真っ最中だ | -1 |
| ええ。あんまり人には言えない恥ずかしい癖なんどすが、何やと | Heart Gauge Change |
|---|---|
| 髪の毛をいじる | No change |
| 指をしゃぶる | -1 |
| 股ぐらをかく | +1 |
| 男は銭稼いでなんぼと思いますわ。 | Heart Gauge Change |
|---|---|
| 確かにその通りだ | -1 |
| 花丸はいくらになるんだ? | +1 |
| 銭だけでは買えないものがある | No change |
| 思わず、ぎゅうって抱きしめたくなるんどすわ。 | Heart Gauge Change |
|---|---|
| 俺も子供は大好きだ | No change |
| ほどほどにした方がいい | -1 |
| 俺もぎゅうっとしてくれ | +1 |
| 桐生はん、思わず惚れてしまいそうなことって、何かあります? | Heart Gauge Change |
|---|---|
| 髪をかき上げたとき | -1 |
| 潤んだ瞳で見つめられたとき | +1 |
| 物欲しそうに舌なめずりしたとき | No change |
| 桐生はんが好きな人に告白するときって、どうやって告白するんどすか? | Heart Gauge Change |
|---|---|
| 好きだと大声で叫ぶ | +1 |
| こっそり手紙を忍ばせる | No change |
| 寝込みを襲う | -1 |
| 桐生はんの体から。。。なんか血の匂いがするんやわ。。。 | Heart Gauge Change |
|---|---|
| 実は大怪我してる | +1 |
| 風呂に入ってない | -1 |
| 俺に近づくと怪我するぜ | No change |
| 桐生はんは、何でわたいを指名してくれたんどす? | Heart Gauge Change |
|---|---|
| 一番綺麗だったから | No change |
| 見た目が変わってるから | +1 |
| 誰でも良かったから | -1 |
| こんな若いぴちぴちの乙女に向かって、おっさんってひどい | Heart Gauge Change |
|---|---|
| それは言い過ぎだ | No change |
| 愛情表現のひとつだ | +1 |
| どこが乙女なんだ? | -1 |
| すでに禿げ上がってしもうてる人もいますけどな。 | Heart Gauge Change |
|---|---|
| よくできたかつらだ | +1 |
| かつらを被ればいい | -1 |
| 禿げてもいいじゃないか | No change |
| そう言えば、桐生はん、どんな女が好きなんどすか? | Heart Gauge Change |
|---|---|
| 花丸のような気が利いた女 | +1 |
| 花丸のような色気のある女 | -1 |
| 花丸のようなさっぱりとした女 | No change |
| それに、一緒におって楽しい方が、ええに決まってますやん。 | Heart Gauge Change |
|---|---|
| 男は黙ってる方がいい | -1 |
| 俺は笑いで天下を取る | +1 |
| そう言えば隣の家に囲いができたね | No change |
| そんで、わたいがお金を稼いで、医者に面倒みてもらってるんどすわ。 | Heart Gauge Change |
|---|---|
| 親孝行だな | +1 |
| 病気は治らないのか? | No change |
| 諦めた方がいいんじゃないか? | -1 |
| だから、いっつもわたいが世間話するだけのお座敷になるんどす。 | Heart Gauge Change |
|---|---|
| 花丸の勢いに圧倒されているのでは? | -1 |
| 花丸を前に緊張しているのでは? | +1 |
| 会話が目当てではないのでは? | No change |
| 例えば、男が客をもてなすお座敷があってもええのとちゃいますか? | Heart Gauge Change |
|---|---|
| 想像すると気持ち悪い | No change |
| それはいい考えだ | +1 |
| そんなお座敷は成り立たない | -1 |
| でも、この仕事、ご返杯せなあかんどすやろ? | Heart Gauge Change |
|---|---|
| 仕事だから慣れるしかない [This will increase your intoxication level] | +1 |
| 客に対して失礼だ | -1 |
| 俺も正直弱い | No change |
| でも、ひと目見て、自分に合うか合わないかで、決めた方が絶対に | Heart Gauge Change |
|---|---|
| それは極論だ | No change |
| つまり見た目ということか? | -1 |
| 情も立派な愛情だ | +1 |
| ひっかかった~ | Heart Gauge Change |
|---|---|
| 何がひっかかったんだ? | No change |
| そういうお前も毛が出てる | +1 |
| いっぺん殺してやろうか? | -1 |
| まぁ、お客はんには、すっぴんなんて、絶対に見せられまへんけど。 | Heart Gauge Change |
|---|---|
| すっぴんのままでいい | +1 |
| 確かに見たくはない | -2 |
| 女はいつもそうだ | No change |
| わたいの戦法は、防衛一点張りどすわ。どんな戦法かと思います? | Heart Gauge Change |
|---|---|
| 白熊囲い | -1 |
| 穴熊囲い | +1 |
| 花丸囲い | No change |
Special Dialogue
| After getting the heart gauge up to 11 hearts | |
|---|---|
| 親に捨てられて、さまよってるところ、今のお父ちゃんに拾われた | Heart Gauge Change |
| もっと詳しい聞かせてくれ | +1 |
| この町ではよくある話だ | No change |
| 運が良かったな | -1 |
| After getting the heart gauge up to 16 hearts | |
|---|---|
| 桐生はんは。。。結婚するつもりは無いんどすか? | Heart Gauge Change |
| 俺にはまだやるべきことがある | -1 |
| 気になる女はいる | +1 |
| 一生結婚するつもりはない | No change |
| After getting the heart gauge up to 20 hearts | |
|---|---|
| わたい。。。ほんまはお客に惚れない主義なんやけど。。。 | Heart Gauge Change |
| 色仕掛けがうまい | -2 |
| いい女だと思ってる | +1 |
| お堅い女だと思ってる | No change |
Date
Hanamaru is not keen on expensive food. The best option for her date is Hatsukaze. Some of the food she likes there is very cheap so it won't cost you much to get a +2 heart gauge boost. Even the most expensive item she likes on the menu is only 600 Mon, but since the amount you spend does not change the standard +1 heart gauge increase for ordering something she likes, there is no point spending more than necessary. Save your money and get the cheapest option she likes.
| Place | Heart Gauge | Food/Items that increase the heart gauge by +1 |
|---|---|---|
| Koyoro | -1 | Ume Banquet for 2 |
| Hatsukaze | +1 | Rikyu Egg for 2 / Kotori Zosui for 2 / Oyster Rice for 2 / Eel Kabayaki for 2 / Turtle Hot Pot for 2 |
| Ginya | No change | Barazushi for 2 / Steamed Sushi for 2 |
| Arigataya | +0.5 | Golden Hairpin / Fireworks Kimono / Cherry Blossom Kimono / Wave-Pattern Obi / Dutch Box / Edo Women's Sachet |

If you do take her to Koyoro, which she hates, you can still enjoy the dining scene with her. Remember that even if the date is a failure, you can keep dating until you succeed (which will allow you to progress towards the yujo's substory).
Shirayuki

Brothel Azamiya
Session Fee 4000 Mon
Rank Tenjin
Birthday 24th December
Bust/Waist/Hip 82/58/86
Hobbies Shamisen
About Shirayuki
She is naturally a fairly shy person, which is why she didn't have many customers at first. However, she has gone on to become an extremely popular and successful yujo, reaching the Tenjin rank. She prefers more "refined" or "classy" types of customer.
See substory 6 for details on Shirayuki's substory (triggered after getting her heart gauge up to 20 hearts).
Ordering and Gifts
| Drink | Price | Intoxication | Heart Gauge |
|---|---|---|---|
| Green Tea | Free | -150 ~ -50 | -0.25 |
| Orange Water | 50 Mon | -50 ~ 0 | No change |
| Blackcurrent Orange Sake | 100 Mon | 100 ~ 200 | +0.5 |
| Malt Sake | 200 Mon | 150 ~ 250 | No change |
| Flaming Shochu | 800 Mon | 350 ~ 450 | No change |
| Amber European Sake | 2000 Mon | 200 ~ 400 | -0.5 |
| Maiden's Amazake | 3000 Mon | 100 ~ 120 | +1 |
| Snowy Wind Refined Sake | 5000 Mon | 150 ~ 350 | +0.5 |
| Sugoroku Unrefined Sake | 8000 Mon | 200 ~ 300 | No change |
| Celebration Sake | 1 Ryo | 200 ~ 500 | +0.5 |
| Food | Price | Intoxication | Heart Gauge |
|---|---|---|---|
| Picked Vegetables | 30 Mon | -10 | -0.25 |
| Red and White Manju | 50 Mon | -20 | No change |
| Dried Squid | 80 Mon | -5 | No change |
| Fresh Vegetables | 100 Mon | -30 | No change |
| Nori Wasabi Sea Bream Chazuke | 200 Mon | -70 | +0.5 |
| Boiled Kyoto Vegetables | 300 Mon | -40 | +0.5 |
| Sparrow Yakitori | 400 Mon | -60 | +1 |
| Fruit Serving | 500 Mon | -50 | No change |
| Seafood Funamori | 800 Mon | -80 | -0.5 |
| Broiled Tuna Head | 1000 Mon | -90 | +0.5 |
Gifts
| Likes (Heart Gauge +1) | Mechanical Doll / Flower-Pattern Obi / Flower-Pattern Incense Burner / Kyoto Women's Sachet / Gold Plate / Gold Comb / Cherry Blossom Kimono / Rising Dragon Inro / Hina Doll Emperor / Village Tribute / Picture of an Actor |
| Loves (Heart Gauge +2) | Golden Hairpin / Potted Chrysanthemum / Fireworks Kimono / Hina Doll Empress |
Conversations
NOTEThe dialogue options are random (with the exception of the special dialogue options, which trigger at specific points). Because of this, translating the dialogue below isn't going to be very helpful. Instead, I am providing the Japanese text. In the header you will see the yujo's dialogue. The rows below are the 3 options from which you can choose. Use the Japanese text below to match what you're seeing on the screen in game. It might be a bit tedious, but there is no time limit when selecting an option so you can take your time.
Regular Dialogue
| うち、お酒にあんまり強くないから、強くなる方法を知りたいんどす。 | Heart Gauge Change |
|---|---|
| 量をたくさん飲むこと [This will increase your intoxication level] | -1 |
| 酒の美味さを知ること | No change |
| 無理に強くなる必要なはない | +1 |
| うち、三味線弾くのが好きなんどす。 | Heart Gauge Change |
|---|---|
| 太夫 | No change |
| 天神 | +1 |
| 鹿恋 | -1 |
| うち、わりと動物好きで、犬や猫を見ると、思わず飼いたくなって | Heart Gauge Change |
|---|---|
| 犬 | +1 |
| 猫 | No change |
| 白雪 | -2 |
| うちが、桐生はんの好みに近いか確かめたいんどす。 | Heart Gauge Change |
|---|---|
| 胸が大きくて、お尻の小さな女 | -1 |
| 一緒にいると心が安らぐ女 | +1 |
| たくましい女 | No change |
| 桐生はんは、あざみの花を見てどないなこと思います? | Heart Gauge Change |
|---|---|
| 見たことがない | No change |
| 可憐で可愛い | +1 |
| とげがあって痛そう | -1 |
| 桐生はん、取っておくれやす。痛いどすえ。 | Heart Gauge Change |
|---|---|
| 取ってやる | +1 |
| しばらくすれば涙で自然に取れる | -1 |
| (黙って、顔を近づける) | -2 |
| 桐生はんは、「すい」と「いき」だったら、どちらどすか? | Heart Gauge Change |
|---|---|
| すい | No change |
| いき | +1 |
| 「粋」の意味がわからない | -1 |
| 桐生はんは、どんな食べ物が好きなんどすか? | Heart Gauge Change |
|---|---|
| お刺身 | -1 |
| うどん | No change |
| ご飯 | +1 |
| この前、とってもど助平な商人はんからおかしな贈り物をもろうたんです | Heart Gauge Change |
|---|---|
| じゅばん | No change |
| こけし | +1 |
| お菓子 | -1 |
| 最近、うち、仕事が終わった後、眠らなあかんときに、全然眠らへん | Heart Gauge Change |
|---|---|
| 酒を飲む | -1 |
| 俺の顔を思い浮かべる | No change |
| 俺が子守歌を歌ってやる | +1 |
| せやけど、もうそれ以来、異国の人が大の苦手になってしまったんどす。 | Heart Gauge Change |
|---|---|
| 大きかったから | -1 |
| 匂いが駄目 | +1 |
| 言葉が通じなかったから | No change |
| その甲斐あって、このあざみ屋で一番の腕前やと思うて | Heart Gauge Change |
|---|---|
| 自惚れるのはよくない | -2 |
| 白雪が祇園一だ | No change |
| さらに精神してほしい | +1 |
| それが、なんて呼ばれるせっかんか、知ってはります? | Heart Gauge Change |
|---|---|
| ばしばし | No change |
| ぶりぶり | +1 |
| ぼきぼき | -1 |
| そんで、うちの体の中で、いまひとつ魅力のないとこを考えから、 | Heart Gauge Change |
|---|---|
| 確かに胸が大きいほうがいい | -1 |
| 胸は大きさよりも形だ | No change |
| 胸の大きさは関係ない | +1 |
| そんな風に、遊女にお客がつかずに売れ残ることを「何をひく」と言うか | Heart Gauge Change |
|---|---|
| 身をひく | No change |
| 水をひく | -1 |
| お茶をひく | +1 |
| で、それに対して、「女は・・・」なんだったかを教えておくれやす。 | Heart Gauge Change |
|---|---|
| 愛嬌 | +2 |
| 卑怯 | -2 |
| 最強 | +1 |
| ところで、桐生はんは、夜更かしされるほうどすか? | Heart Gauge Change |
|---|---|
| 夜更かしはしない | -1 |
| 毎日、夜更かしばかり | No change |
| どちらとも言えない | +1 |
| ところで、桐生はんは、このあざみ屋のお座敷遊びでは、どの遊びが | Heart Gauge Change |
|---|---|
| いろはかるた | No change |
| 投扇興 | +1 |
| 金比羅船々 | -1 |
| へぇ、普通なら嬉しいことなんどすけど、でも、その商人はんが | Heart Gauge Change |
|---|---|
| 俺が懲らしめてやる | No change |
| どんな客でも大切にしろ | +1 |
| どんなことをされるんだ? | -1 |
| まるで、空から、お星さまが降ってきたようどすなぁ。 | Heart Gauge Change |
|---|---|
| 打ち上げ花火 | No change |
| 線香花火 | +1 |
| ねずみ花火 | -1 |
| もっと、お金を稼げる遊女になるには、どうしたらええんどすか? | Heart Gauge Change |
|---|---|
| もっと芸を磨く | +1 |
| もっと色気を出す | -1 |
| もっと人に優しくする | +2 |
Special Dialogue
| After getting the heart gauge up to 11 hearts | |
|---|---|
| 桐生はんも、誰かの形見を持ってはったりします? | Heart Gauge Change |
| 持っている | +1 |
| 持っていない | -1 |
| 教えたくない | No change |
| After getting the heart gauge up to 16 hearts | |
|---|---|
| その祇園へ向かう連中、ある事件が起きたんどす。 | Heart Gauge Change |
| 一緒に連れてこられた娘が逃げ出した | +1 |
| 女衒に襲われた | -1 |
| 森で熊に出会った | No change |
| After getting the heart gauge up to 20 hearts | |
|---|---|
| そこら辺の様子が、まだ読み書きが達者でない弟妹たちから | Heart Gauge Change |
| いますぐ会いにいけ | -1 |
| いままで以上に働け | +1 |
| いまから神社で祈れ | No change |
Date
You don't get a +1 heart gauge boost just by visiting somewhere with Shirayuki, so the maximum heart gauge increase you can get on a date with her is +1.5. The cheapest option is to visit Hatsukaze, where you can order cheap food and get a heart gauge boost.
If you visit Arigataya and buy something for her, the heart gauge increase can vary when compared to the increase you get for offering the item as a gift when visiting the yujo. For example, in the case of Shiraki, if you gift her a Golden Hairpin when you visit her at Azamiya, the heart gauge increases by +2, but buying it here on a date gives an increase of +1, because buying/ordering something she likes will always give a +1 boost and nothing more.
| Place | Heart Gauge | Food/Items that increase the heart gauge by +1 |
|---|---|---|
| Koyoro | +0.5 | Take Banquet for 2 / Shiko no Zen Banquet for 2 |
| Hatsukaze | +0.5 | Rikyu Egg for 2 / Egg Iridashi for 2 / Boiled Tofu for 2 |
| Ginya | -1 | Futomaki for 2 / Wakame Wakizushi for 2 |
| Arigataya | No change | Golden Hairpin / Fireworks Kimono / Cherry Blossom Kimono / Flower-Pattern Obi / Kyoto Women's Sachet |

Asagiri

Brothel Yumejiya
Session Fee 1 Ryo
Rank Tayu
Birthday 12th September
Bust/Waist/Hip 87/58/84
Hobbies Dancing
About Asagiri
You can spend time with Asagiri after completing the substories of all 6 of the other yujo in the game. Asagiri is regarded as a legendary yujo and is said to dance more beautifully than any other yujo in Gion. She comes across as very ladylike, but will use her charm to play around with customers. She only reveals her heart to sincere men.
See substory 7 for details on Asagiri's substory (triggered after getting her heart gauge up to 20 hearts).
Ordering and Gifts
| Drink | Price | Intoxication | Heart Gauge |
|---|---|---|---|
| Green Tea | Free | -150 ~ -50 | -0.5 |
| Orange Water | 50 Mon | -50 ~ 0 | -0.5 |
| Blackcurrent Orange Sake | 100 Mon | 100 ~ 200 | -0.25 |
| Malt Sake | 200 Mon | 150 ~ 250 | -0.25 |
| Flaming Shochu | 800 Mon | 350 ~ 450 | No change |
| Amber European Sake | 2000 Mon | 200 ~ 400 | No change |
| Maiden's Amazake | 3000 Mon | 100 ~ 120 | No change |
| Snowy Wind Refined Sake | 5000 Mon | 150 ~ 350 | No change |
| Sugoroku Unrefined Sake | 8000 Mon | 200 ~ 300 | +0.5 |
| Celebration Sake | 1 Ryo | 200 ~ 500 | +1 |
| Food | Price | Intoxication | Heart Gauge |
|---|---|---|---|
| Picked Vegetables | 30 Mon | -10 | -0.25 |
| Red and White Manju | 50 Mon | -20 | -0.25 |
| Dried Squid | 80 Mon | -5 | -0.5 |
| Fresh Vegetables | 100 Mon | -30 | No change |
| Nori Wasabi Sea Bream Chazuke | 200 Mon | -70 | No change |
| Boiled Kyoto Vegetables | 300 Mon | -40 | -0.25 |
| Sparrow Yakitori | 400 Mon | -60 | No change |
| Fruit Serving | 500 Mon | -50 | No change |
| Seafood Funamori | 800 Mon | -80 | -0.25 |
| Broiled Tuna Head | 1000 Mon | -90 | +1 |
Gifts
| Likes (Heart Gauge +1) | Red Lion Shortsword [Final Grade] / Red Bat / Akkirasetsu (including Final Grade) / Thick Steel Great Wakizashi [Final Grade] / Amenohabakiri (all grades) / Amanomurakumo (all grades) / Demon Fang (all grades) / Kageboshi (all grades) / Kachofuketsu / Flower-Pattern Obi / Flower-Pattern Incense Burner / Golden Hairpin / Gold Plate / Gold Comb / Strong Bat / Ultimate Tamahagane Greatsword (all grades) / Ultimate Tamahagane Treasured Sword (all grades) / Antique Sword / Vajra Greatsword (all grades) / Kongomaru / Sakurafubuki (all grades) / Rusty Sword / Rising Dragon Inro / White Lion Sword (all grades) / Divine Seven-Branched Sword (all grades) / Water God Sword (all grades) / Radiant Blade (all grades) / Twin Dragon Sword (all grades) / Potted Chrysanthemum / Tamahagane Greatsword (all grades) / Iron Greatsword (all grades) / Superior Tamahagane Greatsword (all grades) / Superior Tamahagane Treasured Sword (all grades) / Foreign Coin / Nishikinagashi [Final Grade] / Chimera-Slayer / Kosaimaru / Shiroganemaru / Bat / Fireworks Kimono / Large Fan / Biidorimaru (all grades) / Heat-Absorbing Blade / Undying Blade / Futsunomitama (all grades) / Old Sword / Star Steel Greatsword (all grades) / Portuguese Hand Mirror / Fake Sword (3rd Grade, 4th Grade, Final Grade) / Mizuchi-Killer / Spirit Sword (all grades) / Village Tribute / Brittle Steel Greatsword (all grades) / Picture of an Actor / Yatsuka Blade (all grades) / Electric Fan / Dragon-Slayer (all grades) |
| Loves (Heart Gauge +2) | Brand-New Cloth |
Conversations
NOTEThe dialogue options are random (with the exception of the special dialogue options, which trigger at specific points). Because of this, translating the dialogue below isn't going to be very helpful. Instead, I am providing the Japanese text. In the header you will see the yujo's dialogue. The rows below are the 3 options from which you can choose. Use the Japanese text below to match what you're seeing on the screen in game. It might be a bit tedious, but there is no time limit when selecting an option so you can take your time.
Regular Dialogue
| あきまへんえ。掃除、洗濯、料理のうちのどれかひとつだけ | Heart Gauge Change |
|---|---|
| 掃除 | +1 |
| 洗濯 | No change |
| 料理 | -1 |
| 桐生はんは、その噂を信じはります? | Heart Gauge Change |
|---|---|
| 信じる | +1 |
| 信じない | No change |
| 実は凶を呼んでいる | -2 |
| 桐生はんも、お芝居に興味あります? | Heart Gauge Change |
|---|---|
| 役者になってみたい | +1 |
| 興味はあるが、役者になりたいほどではない | No change |
| 芝居や役者には全然興味がない | -1 |
| 「口噛み酒」言うて、うちがお米を一粒一粒、口で噛んで造った | Heart Gauge Change |
|---|---|
| そんなもの飲めない | -1 |
| それは飲んでみたい [This will increase your intoxication level] | +1 |
| もうこれ以上、酒は飲めない | No change |
| この店では、金比羅船々と徳利倒しというお座敷遊びが楽しめますけど、 | Heart Gauge Change |
|---|---|
| 金比羅船々 | No change |
| 徳利倒し | +1 |
| どちらも得意 | -1 |
| さらに重ね着してるせいもあって、この季節でも、すぐに汗ばむ | Heart Gauge Change |
|---|---|
| そんな着物はさっさと脱げ | -1 |
| 軽くて涼しい着物はないのか? | No change |
| 優雅に着こなしていることに感心 | +1 |
| そういえば、その扇子のことが元になってできた言葉があるんどすえ。 | Heart Gauge Change |
|---|---|
| 骨折り損 | -1 |
| 天地返し | No change |
| 肝心票 | +1 |
| そうどすか?いままで汚かったものが、きれいになると、気分が | Heart Gauge Change |
|---|---|
| 朝霧の化粧を落とした顔は酷いのか? | -2 |
| 確かに気分が晴れ晴れする | No change |
| 龍屋が汚いから、きれいにしてほしい | +1 |
| そしたら、その後しばらくして、その商人はんは急に大金を | Heart Gauge Change |
|---|---|
| 富くじか博打で当てたのか? | -1 |
| 朝霧が金を貸したのか? | No change |
| 売れ残った品物が急に売れたのか? | +1 |
| そしたら、そんとき、変わった歩き方をしますけど、その歩き方を | Heart Gauge Change |
|---|---|
| 一文字 | -1 |
| 八文字 | +1 |
| 大文字 | No change |
| そしたら、もし桐生はんが新しい送り火の形を付け加えられるとしたら、 | Heart Gauge Change |
|---|---|
| 「天」の字 | -1 |
| 「朝」の字 | +1 |
| 「龍」の字 | No change |
| そないなこと言うてる間にすぐ、お正月はやって来くるんどすえ。 | Heart Gauge Change |
|---|---|
| 何をして過ごすかを聞く | No change |
| 一緒に過ごす約束をする | +1 |
| 断る | -1 |
| そないな場合、どないしたらええんでしょうか? | Heart Gauge Change |
|---|---|
| 俺に任せろ、俺が教える | No change |
| 焦らずに根気よく教える | +1 |
| 朝霧の教え方が悪い | -1 |
| その眠る前の話どすえ。お酒を飲んだときは、どないな気分に | Heart Gauge Change |
|---|---|
| おかしな気分になる | +1 |
| 泣きたい気分になる | No change |
| 怒りたい気分になる | -1 |
| そんでも、起きて、いつものことをやると、今日も頑張ろうという気に | Heart Gauge Change |
|---|---|
| 風呂に入ること | No change |
| 飯を食べること | -1 |
| 身支度をすること | +1 |
| でも、それから、うちは刀のある部分にとても興味を持つようになった | Heart Gauge Change |
|---|---|
| 鞘(さや) | No change |
| 柄(つか) | -1 |
| 鍔(つば) | +1 |
| ところで、小野小町が詠んだ歌で、「花の色は移りにけりないたづらに」 | Heart Gauge Change |
|---|---|
| そんな歌な どぜんぜん知らぬ | -1 |
| わが身世にふる ながめせしまに | +1 |
| 夢と知りせば 覚めざらましを | No change |
| ところで、遊女の最上格をどうして「太夫」と言うのか知ってはりますか? | Heart Gauge Change |
|---|---|
| 舞や能の芝居を行って、その中心役となるから | +1 |
| お祭りで太夫とも言う神主の代わりをするから | No change |
| 多くの夫を持つという意味の「多夫」が転じて | -1 |
| はい、そうどすなぁ。北はその玄武やけど、そしたら東の守護神 | Heart Gauge Change |
|---|---|
| 朱雀 | -1 |
| 青龍 | +1 |
| 白虎 | No change |
| やはり、そう思いはりますか? | Heart Gauge Change |
|---|---|
| おしとやかだったと思う | No change |
| お転姿だったと思う | +1 |
| 恐れられていたと思う | -2 |
| よかったら、うちが持っているのを貸しますけど、読みはりますか? | Heart Gauge Change |
|---|---|
| 読む | No change |
| 読まない | -1 |
| 読んでもらう | +2 |
Special Dialogue
| After getting the heart gauge up to 11 hearts | |
|---|---|
| 一人の男を愛し抜くこと、たくさんの男に恋すること、どちらが | Heart Gauge Change |
| 一人の男を愛し抜くこと | +1 |
| たくさんの男に恋すること | No change |
| 男の俺にはよくわからない | -1 |
| After getting the heart gauge up to 16 hearts | |
|---|---|
| もしかして、桐生はんはお金で何でも買えるとか思ってはります? | Heart Gauge Change |
| 金で何でも買える | -3 |
| 金で買えないものもある | No change |
| 金なんて全然必要ない | +2 |
| After getting the heart gauge up to 20 hearts | |
|---|---|
| 桐生はん、うちはこの先、何を励みにしていくのがええのか、 | Heart Gauge Change |
| 女将になること | +1 |
| 身請けされること | -2 |
| 禿を育てていくこと | +2 |
Date
If you want to build up the heart gauge on a date with Asagiri, you'll need to splash out some money. She does not like any of the cheap options (Hatsukaze and the sushi restaurant, Ginya), so you'll either have to go to the expensive restaurant (Koyoro) or Arigataya and buy her a gift. The cheapest option here, and this will get you a +2 heart gauge boost, is to go to Arigataya and buy the Portuguese Hand Mirror for 5000 Mon. If you really want to save money, you might have to accept the heart gauge drop to visit Ginya and then buy one of the meals she likes to get the gauge back up again. If you do this, the net heart gauge increase will be +0.5
| Place | Heart Gauge | Food/Items that increase the heart gauge by +1 |
|---|---|---|
| Koyoro | +0.5 | Matsu Banquet for 2 / Shiko no Zen Banquet for 2 |
| Hatsukaze | -0.5 | Boiled Tofu for 2 / Turtle Hot Pot for 2 |
| Ginya | -0.5 | Barazushi for 2 / Steamed Sushi for 2 |
| Arigataya | +1 | Golden Hairpin / Fireworks Kimono / Flower-Pattern Obi / Portuguese Hand Mirror |


